
Understanding Ceramic Glaze Density
Contents
1 — Understanding the Density of a Glaze
2 — How to Measure Ceramic Glaze Density
3 — Making Your Own Hydrometer
Introduction
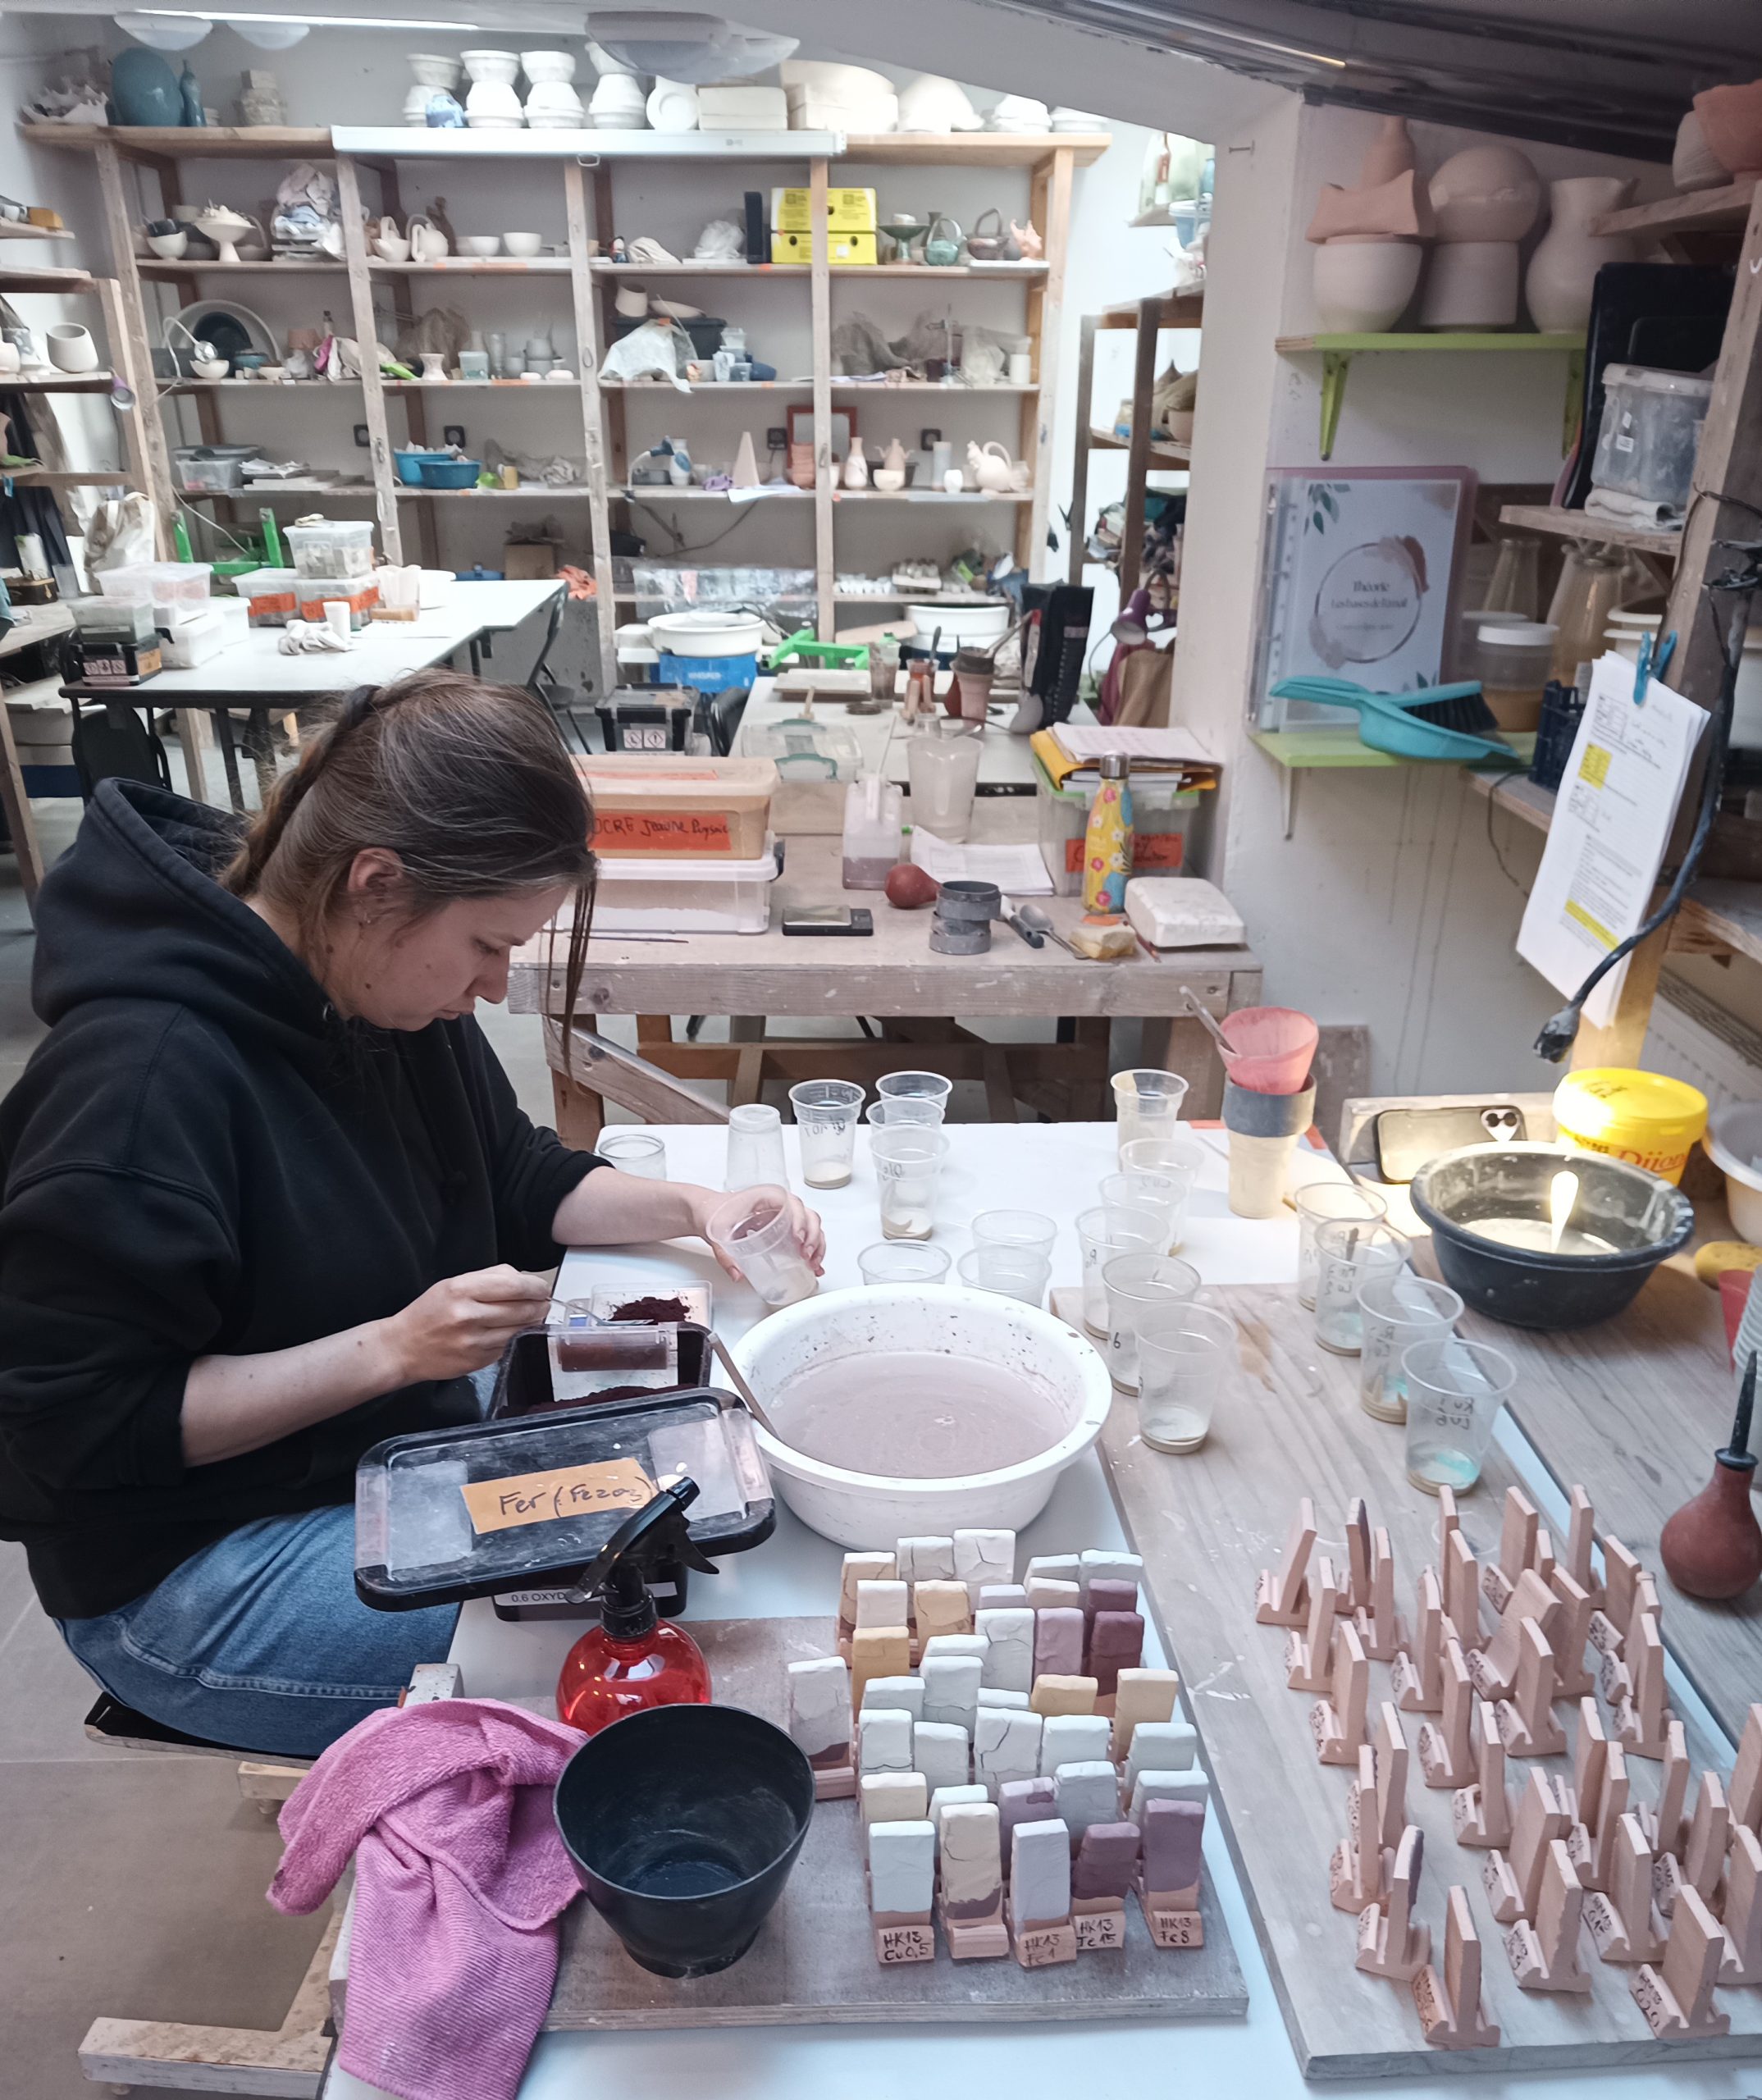
In every apprentice potter’s journey, the application of glazes needs as much attention and precision as the making of the glaze itself. Glaze density is a common source of disappointment. Glaze application is crucial in achieving the desired finish of a piece and students at Créamik have often found that the finish of their work did not come out as expected because a glaze was applied too thickly.
Here we will explain why accurate measurement of density is essential for satisfactory results. We will explore the fundamental principles and importance of glaze density, discussing the difference between glaze density and glaze thickness. We will also show you how to measure it effectively, including how to make a hydrometer or ‘densimeter’.
Understanding the Density of a Glaze
When it comes to ceramic glazing, creativity is essential but so is a good technical understanding of the process. An important aspect of this is the density of the glaze. Density in glazes is often confused with thickness. It is different. Density is a measure of the concentration of solids in a liquid. In a glaze, it refers to the amount of dry matter present in the liquid glaze mixture. Let’s look at the difference between thickness and and density:
Thickness:
Thickness refers to the physical depth of a surface’s coating. In the case of a glaze, it refers to the quantity applied to the surface of a piece.
Density:
Density, on the other hand, refers to the concentration of solid materials in a liquid. In the case of glaze, density refers to the proportion of solid particles (such as minerals, oxides and pigments) compared to the amount of water (or other liquids) in the mixture.
Higher density means higher concentration of solids. It can affect the glaze’s fluidity and its behaviour during application and firing.
In summary, thickness refers to the amount of glaze applied, while density refers to the composition of the glaze itself. To refresh your memory on the basics of glaze, you can re-read our article which covers glaze composition, application methods and firing.
The importance of correct density
The density of the glaze has a direct influence on the result. A glaze which is too dense can cause drips, irregular texture, defects such as bubbles or cracks, shrinkage, detachment, etc, after firing. On the other hand, a glaze which is too diluted will give pale colours and the clay body can even be exposed. An over-diluted glaze looks like a “bad oxide wash”. Of course, your own aesthetic preferences will determine the density of glaze you choose.
When the density of a glaze is correct, it spreads evenly, the water is absorbed by the clay and the glaze remains ‘stuck’ to the surface. This ensures not only the desired aesthetic appearance, but also the durability and quality of the piece. By understanding, measuring and adjusting glaze density, ceramicists can considerably improve the quality of their work.
How to Measure Ceramic Glaze Density
Using commercial hydrometers
Hydrometers are instruments specially designed to measure the density of any liquid, including glazes. These tools are dipped directly into the glaze mixture, and the density is read off a graduated scale. They give an accurate reading and are generally easy to use. They currently cost around €40, but their size (30 cm) means that you need to keep your glaze in a tall container.
Other measuring methods
The first methods described are very simple and based on experience. Consistency method: some people will tell you that the right consistency for a glaze is that of a pancake batter. Others dip their fingers into the glaze and say that the consistency is good when the glaze no longer shows any difference in how it looks on the nail and the skin of the finger. These methods work well and are widely used. In both cases, you need a good deal of experience to recognise that the consistency of the glaze is correct. Understandably, they are quite confusing for beginners…
Weighing method: Another method consists of weighing both the dry matter and the water you add. For example, for 1 kg of dry glaze, you can start by adding 0.75 L of water, carefully measuring the water you add. As you go along, it’s not easy to know the ratio between dry matter and added water. Lastly, while it’s easy to weigh 1 kg, it gets more complicated when you’re working with large quantities of glaze.
Making Your Own Hydrometer
For a more personalised and economical approach, making a hydrometer is an excellent alternative. This do-it-yourself project not only helps you to understand what density is, it also develops a tool perfectly tailored to your needs.
Materials and tools required:
-
- A glass or transparent plastic tube, such as a “test tube”. The tube in this article costs €0.50.
-
- A funnel fitting into the test tube
-
- A cork stopper
-
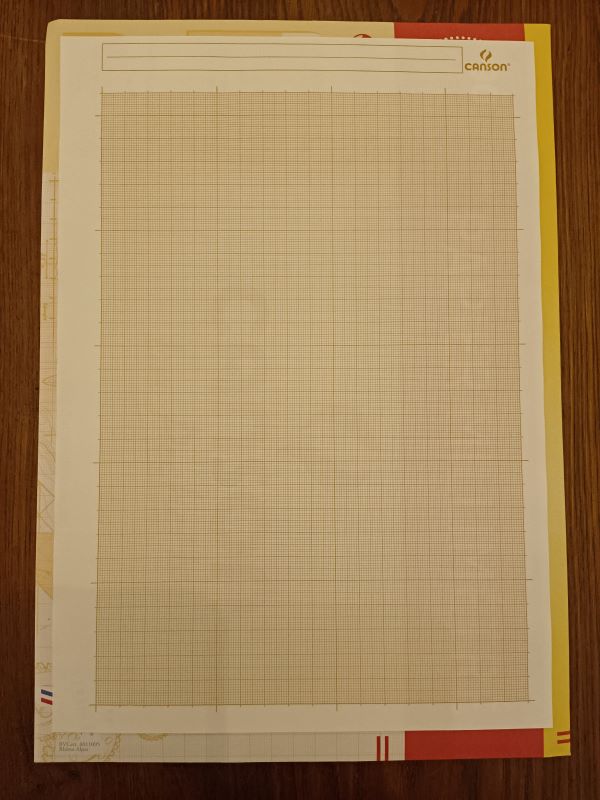
- Graph paper
-
- Weights such as nuts, bolts and stainless-steel washers, as small as possible
-
- A piece of candle
-
- Two saucepans for a bain-marie
Manufacturing stages
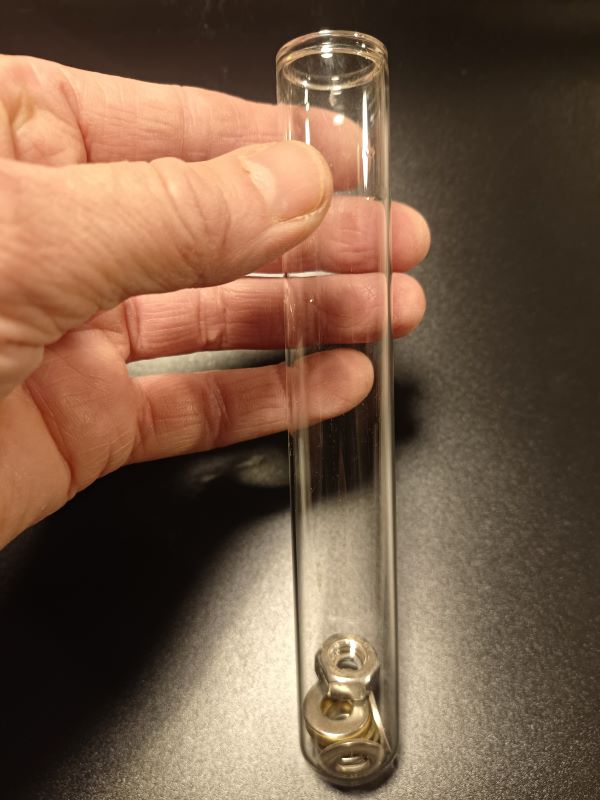
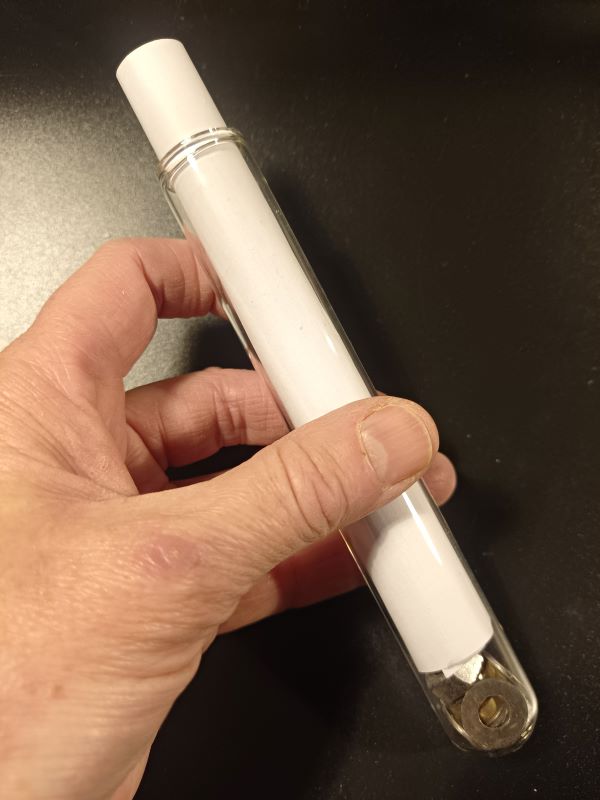
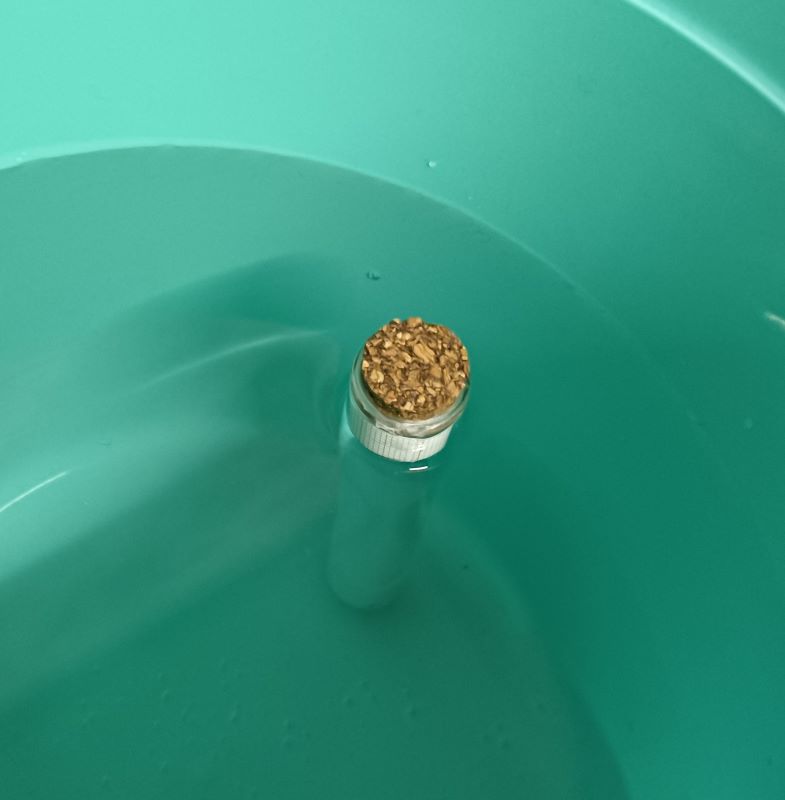
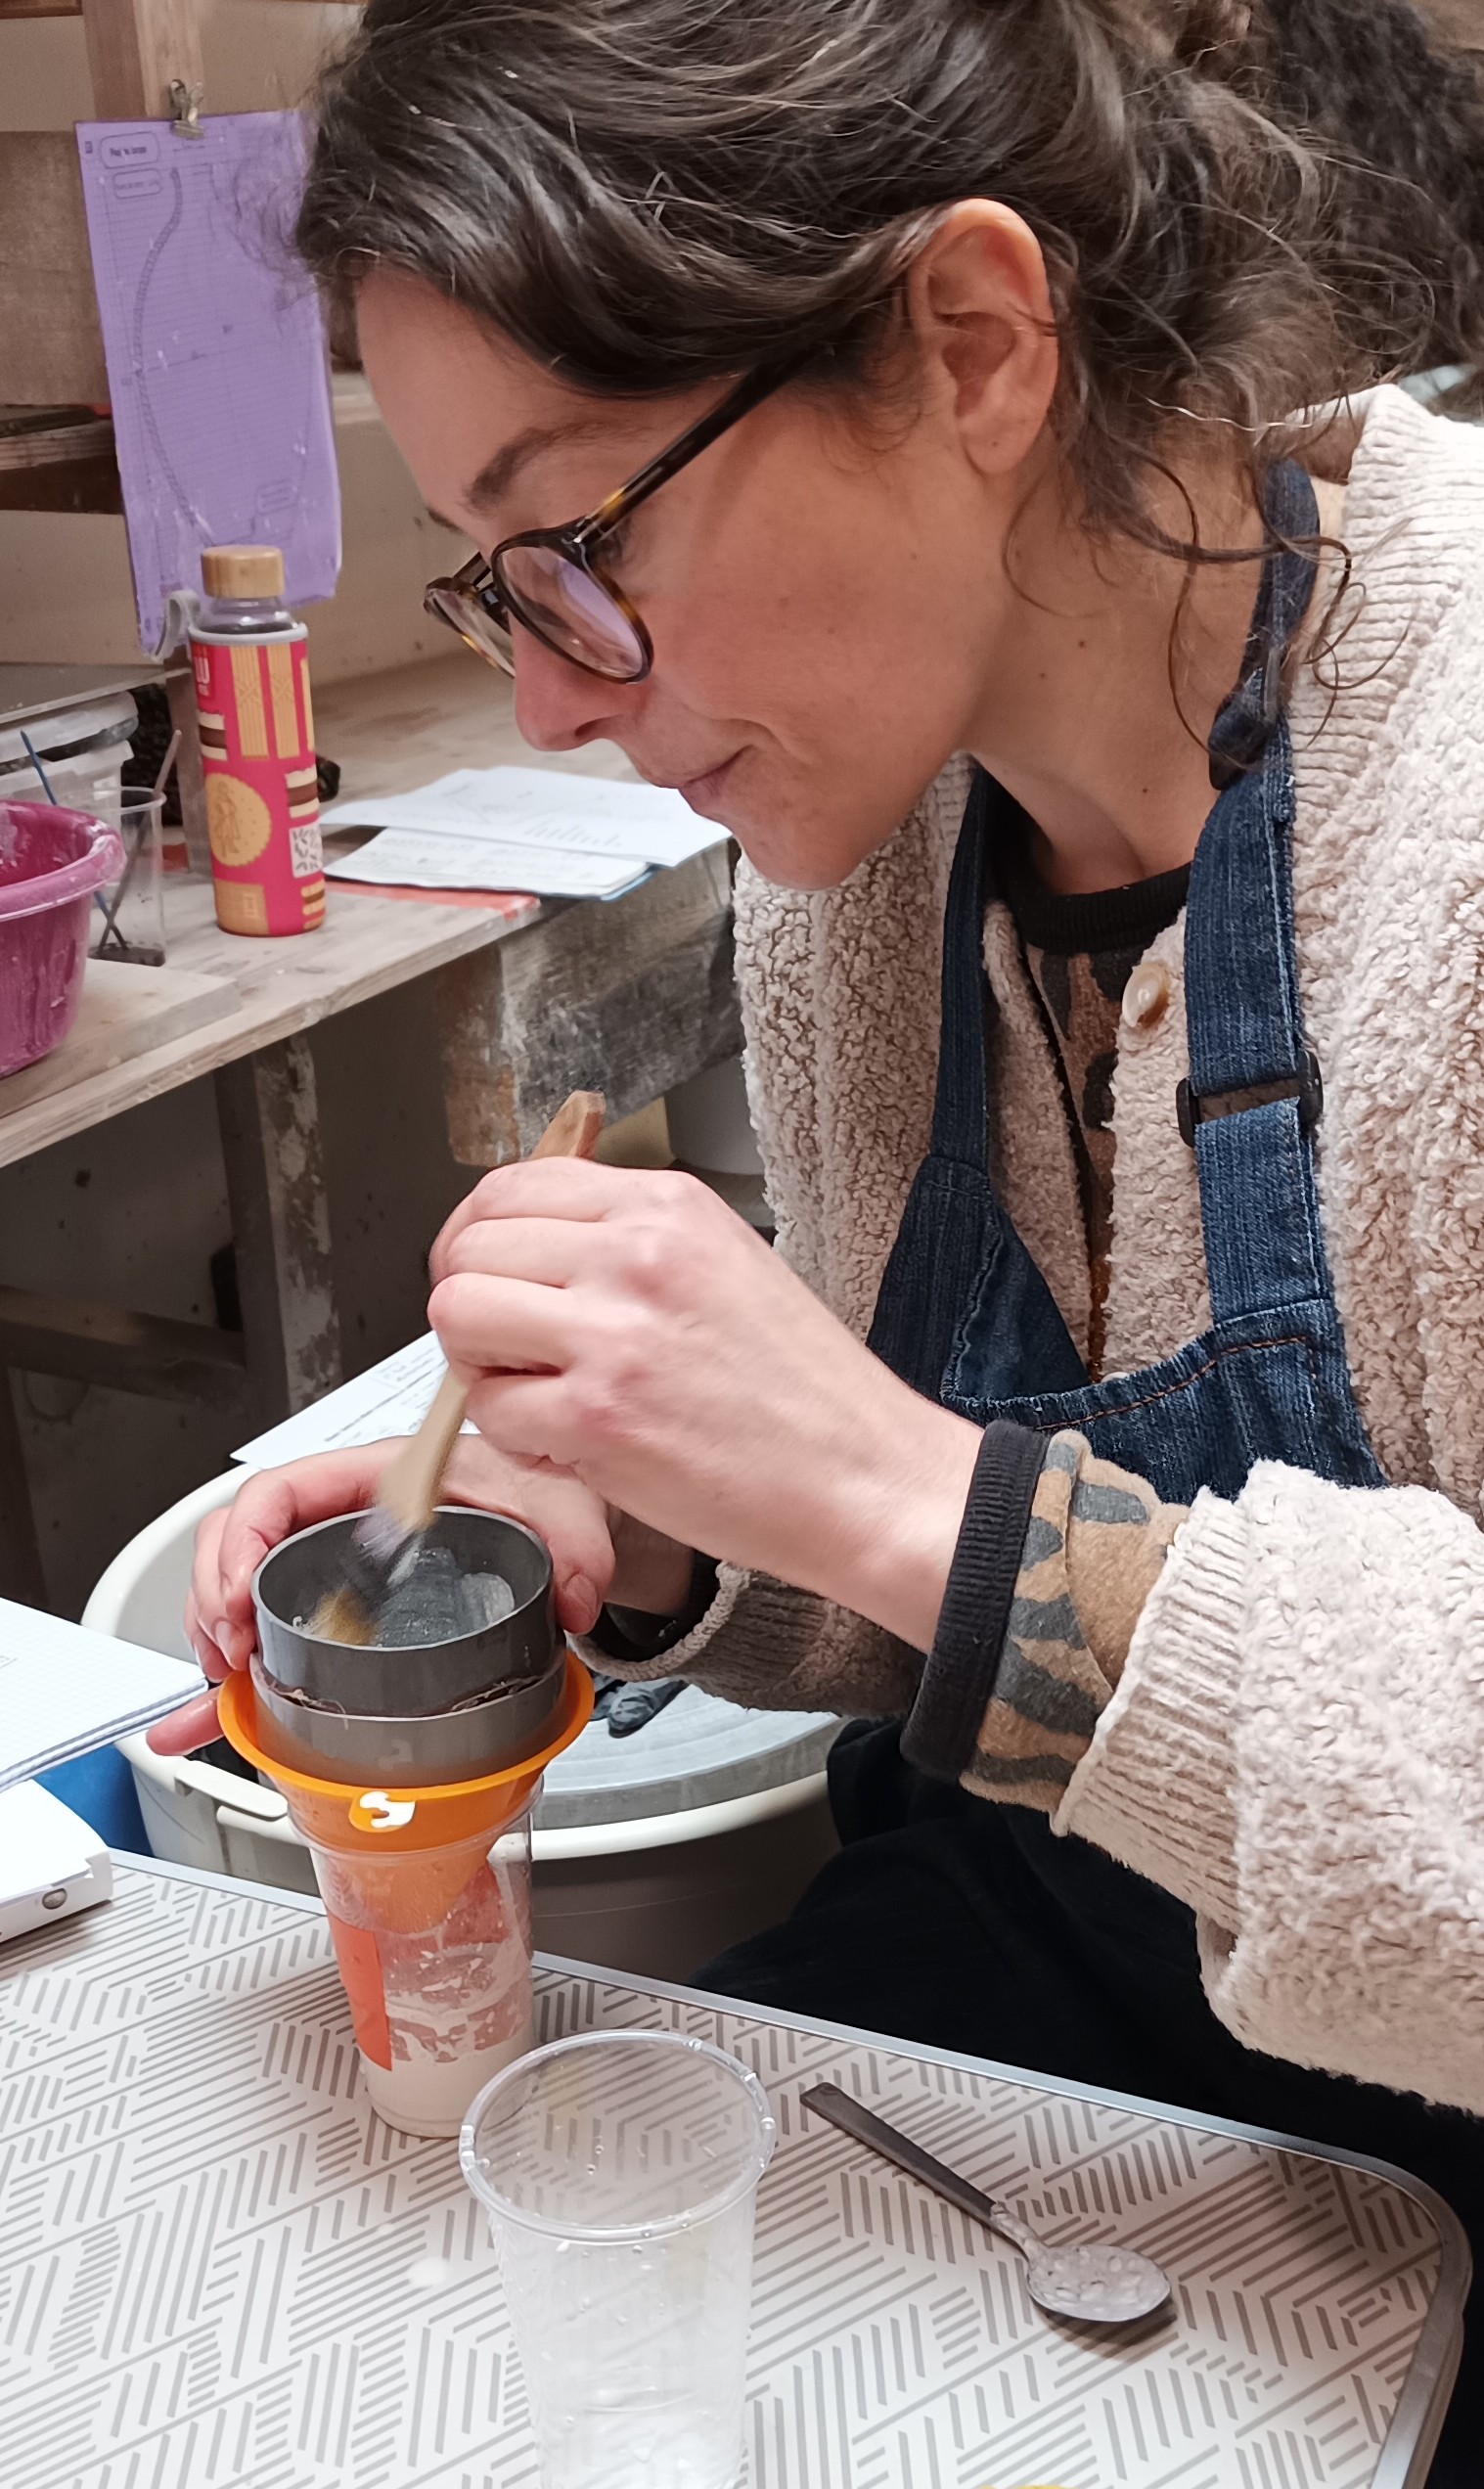
I — Stainless steel nuts and washers are placed in the test tube. To find out the correct weight, immerse the test tube in a bucket of water. As water is less dense than any liquid glaze, the correct weight is when the tube floats and the surface of the water is at the top of the tube (without entering the tube). The tube must float vertically. If it tends to tilt, shake the weights until the tube remains straight in the water.
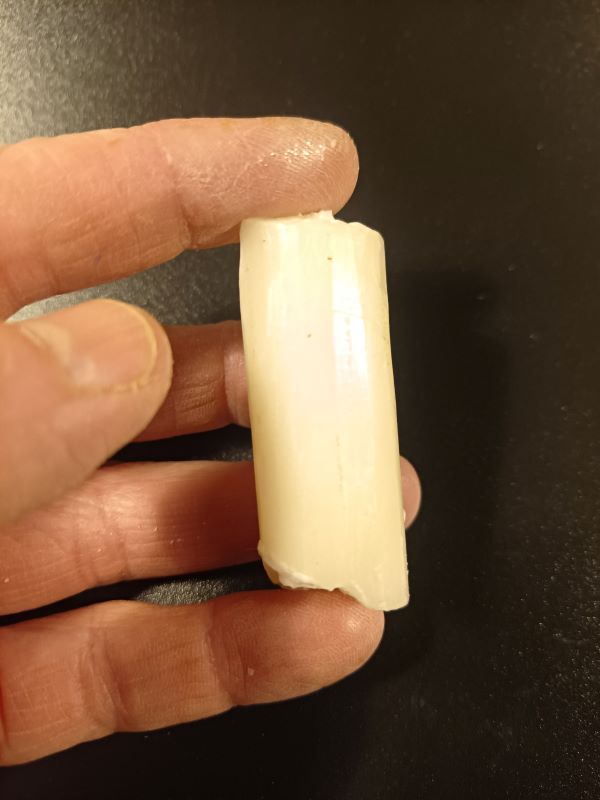
2 — Take a small piece of wax, such as the end of a candle:
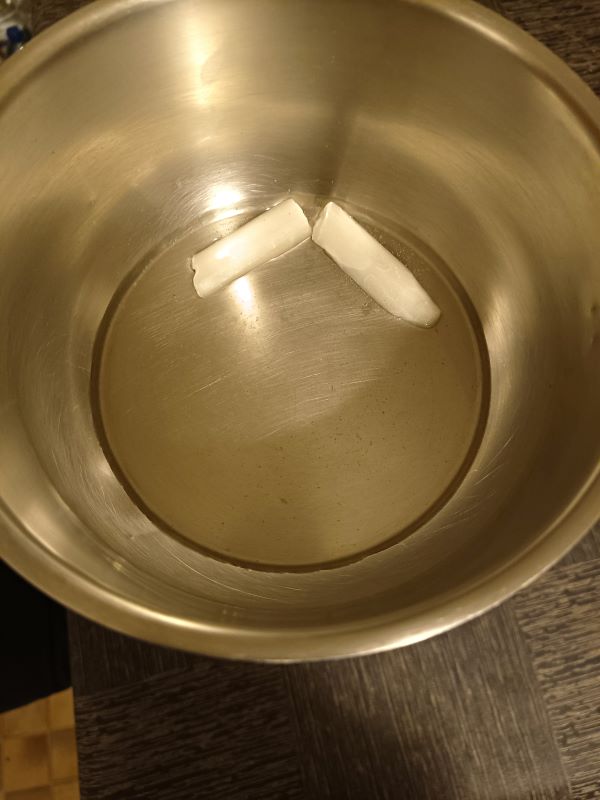
3 —Melt the wax in a bain-marie (this ensures that the wax does not exceed 40°C. If you melt the wax directly over a fire, there is always a risk that it will ignite and set the studio on fire…). The wax will be used to fix the weights to the bottom of the test tube:
4 — Slide a piece of paper into the test tube to prevent the wax you are about to pour from sticking to the sides:
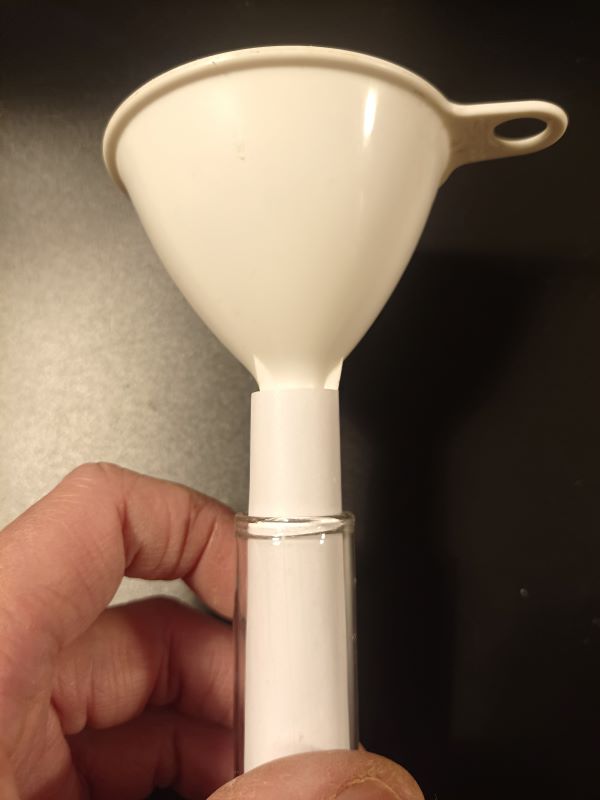
5 — Insert the funnel into the tube:
6 — Pour in the liquid wax until it covers the weights, then remove the paper. Wait for the wax to cool and stabilise, holding the tube vertically:
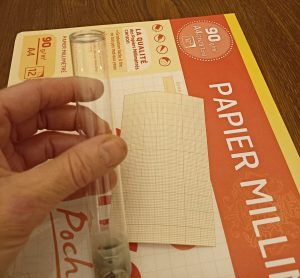
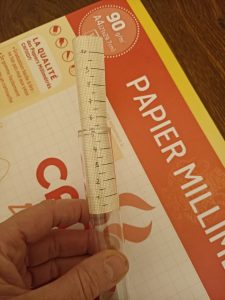
7 — Take a sheet of graph paper:
8 — Cut a rectangle the size of the tube in height and circumference:
9 — Mark off a series of levels on the paper to create a measuring scale:
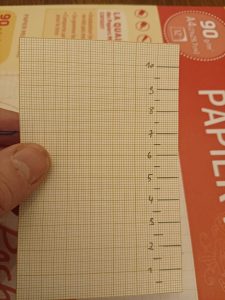
10 — Roll the paper and slide it into the tube:
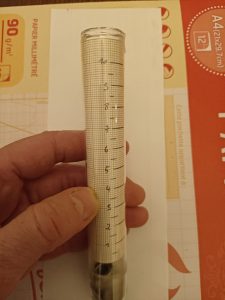
11 — If your tube does not have a cap, use a cork to make one and dip it in the remaining liquid wax to seal the tube tightly. Dip a brush in wax to coat the cork cap to ensure a tight and secure seal:

Here it is:

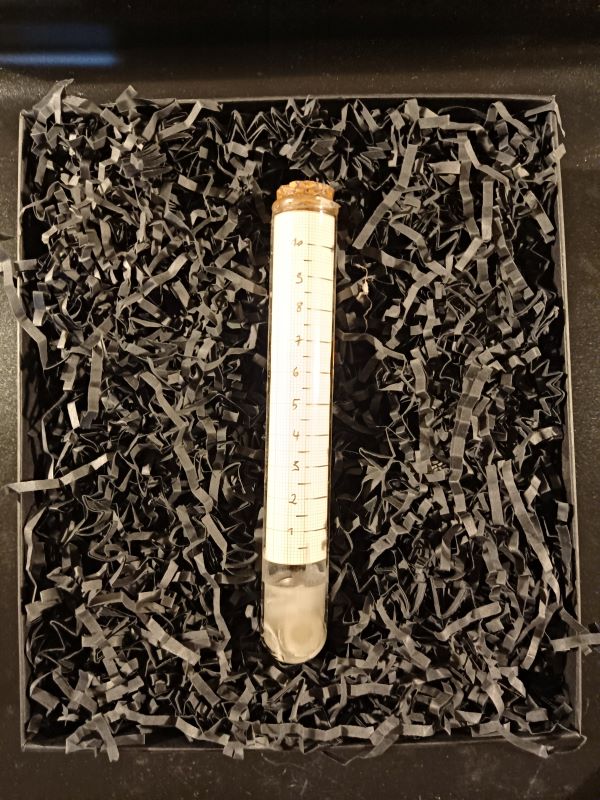
12 — Gently immerse the hydrometer in the water to ensure it floats properly. In this case, the water level was above the 10 mark:
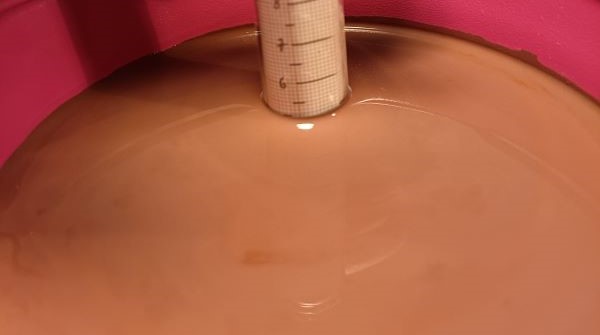
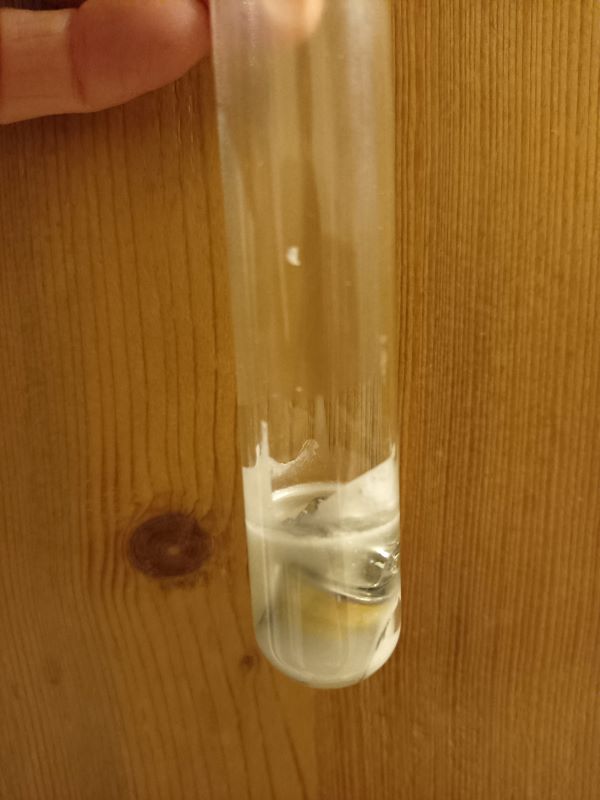
13 — Test the hydrometer in the glaze. It floats but remains suspended in an elevated position because the glaze is denser than the water:
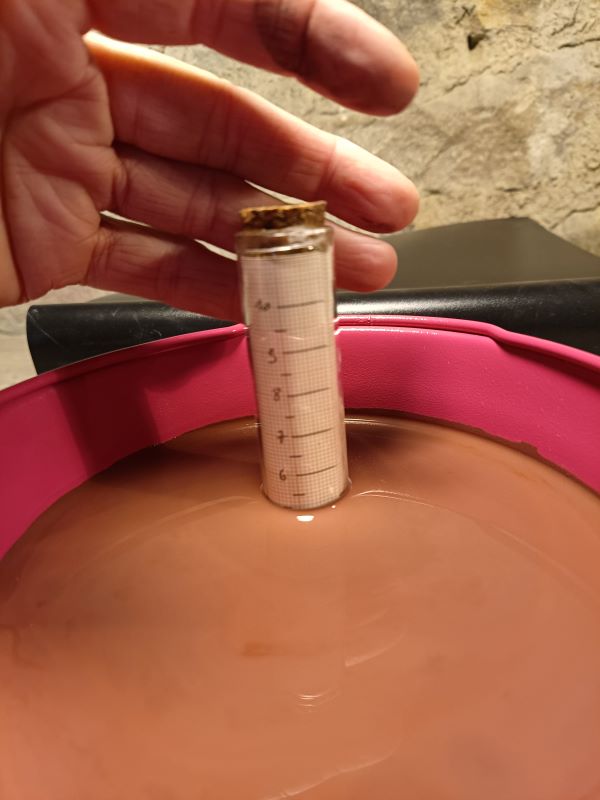
14 — Take the density meter out and read the measurement: you can read 5.2:
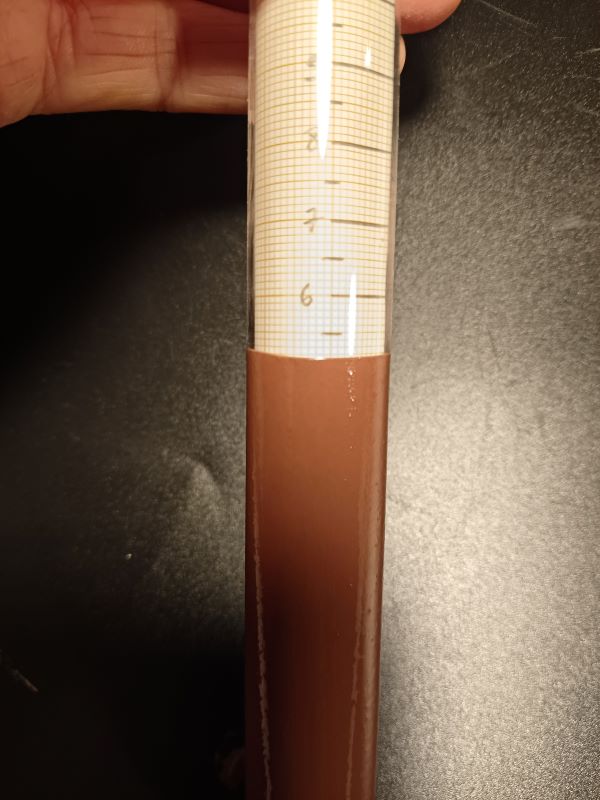
You will then use this reading for this glaze on your pots. According to the results of the firing, some water can then be removed, or more can be added, re-measuring the density each time. Each glaze has a different density. You must measure and note your results for each one of them. The reading is not universal, it is the one obtained by this hydrometer for this glaze. If you break your hydrometer, you will have to measure the density of each glaze again with your new hydrometer.
Use and maintenance
– Before each use, make sure the tube is clean and dry.
– After use, clean the hydrometer thoroughly and store it in a well-protected box. A glass tube breaks easily, but if you’re careful, your hydrometer will last as long as your pottery career!
Conclusion
Tackling glaze density touches on an important aspect of being a ceramicist: each action, each choice leads us in an aesthetic direction. Glaze density, although technical, is ultimately a route towards the expression of our artistry. This article invites us to experiment with the nuances of glaze and find our own path in the world of ceramics.
In the New Year, let’s hope that our glazed creations reflect this harmony between technique and art, and that they bear the mark of our passion and creativity.
")
Resource centre
animated by Matthieu Liévois,
potter-ceramist for over 40 years and founder of the Creamik School
Find all the courses
Keywords
Don’t miss any more news from the Créamik school!
Follow us on the networks
You can also discover…
Less math, better research: Generative Artificial Intelligence in the Ceramic Industry

Garance Lanfray, journey through Southeast Asia

From beginner to professional : choosing the right ceramic courses

Matthieu Liévois, The search for crystals
Can ceramics be fired in a microwave?
Discovering the Art of Japanese Ceramic Masters
Instructions for making your own sieve