
9 tips to make your pottery studio a place of well-being

Lighting: an essential aspect of your workshop
Appropriate clothing: protect yourself and your home
The atmosphere in a pottery studio is very important. Making it a place where you can feel good is essential if you are to get involved in your work with pleasure and motivation. I recently spoke with someone who had just realized a lifelong dream: throwing. The experience was so strong that she became obsessed.
We can all relate to this. At the beginning, the feeling is so intense that you are ready to work under any conditions and persevere at all costs. And yet, some days, despite all the passion, it can be difficult to find the motivation to go to the studio. In this article we will explore in detail how to improve your workspace and create a warm environment as a source of well-being, and to help motivate you on more difficult days. Working with clay tests your body. You need to adopt ways of working with maximum efficiency, creating habits that help transform your studio into a space as inviting as your own home.
1 – Lighting: an essential aspect of your workshop
Light is crucial for a creative atmosphere. Even if you have a view from your studio and natural light most of the day, you should be prepared for winter days with their low light and late evenings spent on the wheel. Choose so-called daylight bulbs (or full-spectrum bulbs), which reproduce natural daylight. The colours illuminated are truer, and you will not strain your eyes.
In a studio, good light around your wheel is very important. Avoid placing lighting directly above the wheel, as it will cast a shadow. Instead, favour lateral or diagonal lighting. Choose floor lamps or desk lamps with articulated arms; you can adapt the lamp’s position to the piece you are working on. A floor lamp is practical because it is easily movable, but it should not be too high either. You need to adjust it to the wheel’s height. With a light source on each side, not only will you work better, but you are all set for taking photos and shooting videos.
2 – Heating
While lighting is crucial in a workshop, you also need to think about heating. It’s not uncommon to start your business in a spartan space like a garage, so you’ll need a minimum of heating in winter. A dehumidifier can also be useful for reducing humidity and warming up the workshop.
3 – Posture and ergonomics
Working on a wheel puts a lot of stress on the body. It’s important to maintain good posture to avoid body aches. This applies in particular to back pain, which can occur as a result of working long hours in a seated position or lifting heavy loads.
Protect your back
Bags of clay can weigh 10-12.5 kg. Larger bags can weigh up to 25 kg, and bags of powdered raw materials or plaster can weigh up to 50 kg. If you move your wheel, it will weigh at least 20 kg, and often much more. Currently, in Europe, the heaviest wheel is the Como Europe. It weighs 60 kg. On the second-hand market, you can find the indestructible Como Dauphiné wheel, which weighs 200 kg . . . Seek advice from physiotherapists and osteopaths to learn how to lift a heavy load while protecting your back.
Ergonomic seat
When throwing, use a height-adjustable seat to position your feet flat on the ground with your hips slightly higher than your knees. This helps prevent excessive pressure on the lower back and hips. Try to avoid twists and excessive movements of the body. Remember to get up regularly, stretch and move around; learn to recognize the signs of fatigue and stress. Stretching and strengthening exercises, such as yoga or Pilates, can be beneficial for improving both back flexibility and strength.
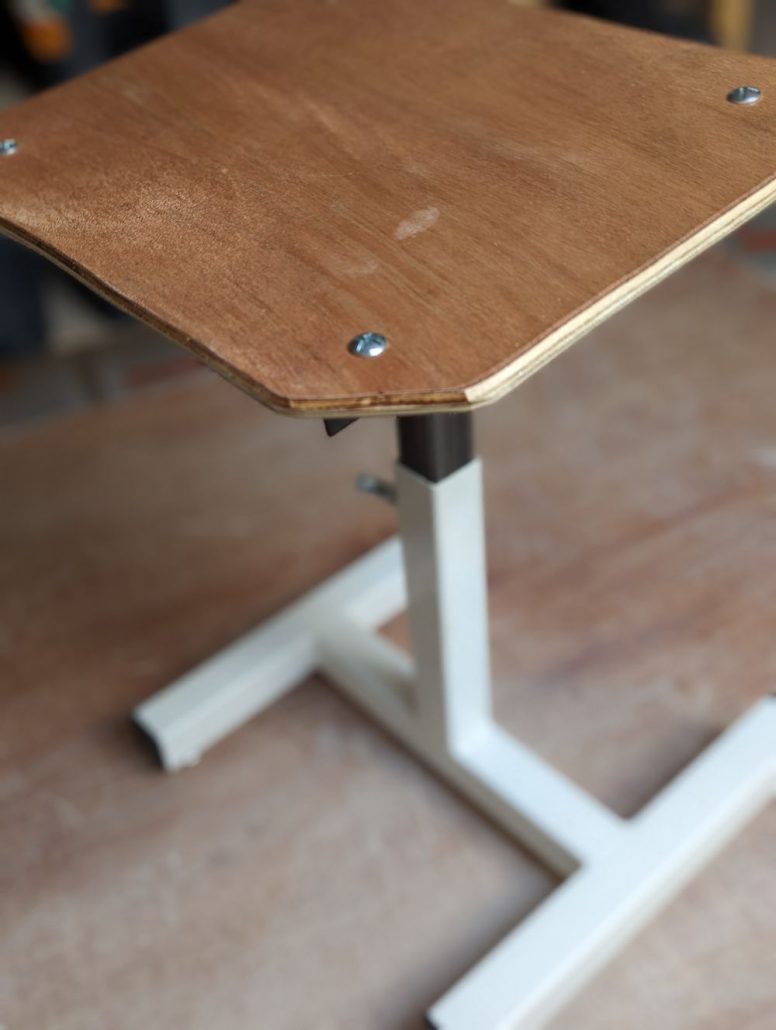
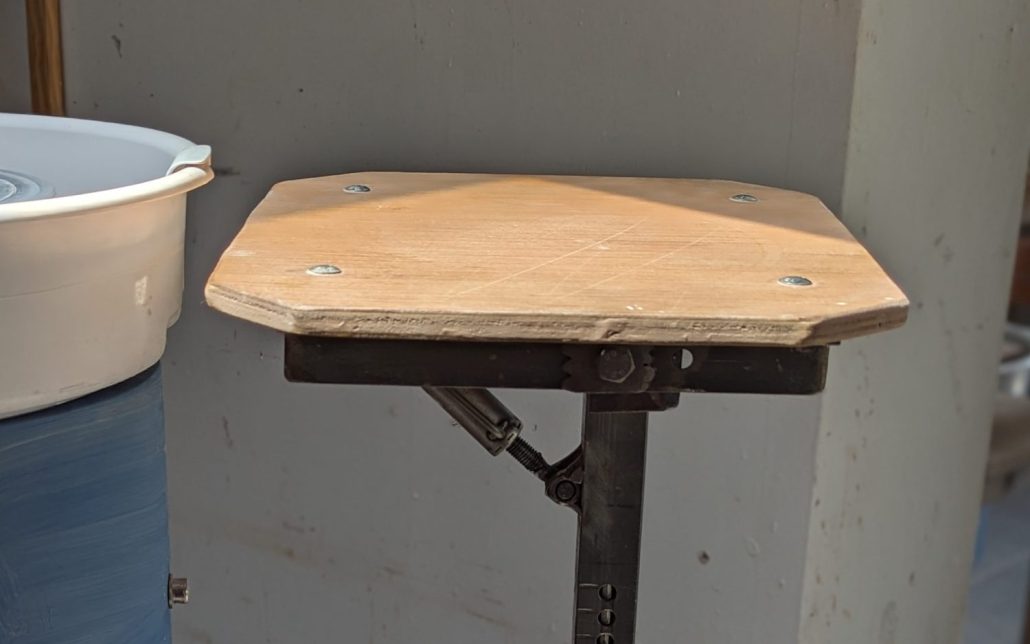
Beyond learning how to move ergonomically, a proper stool will allow the right posture. An ordinary stool might seem sufficient at first, but in the long run, after a few hours of throwing, the potter begins to feel lumbar pain, pain in the wrists, or forearms, and pain in the shoulders. This is largely a matter of seat adjustment. Ideally, it should adjust quickly, without the need for a spanner, hammer, or screwdriver. Especially in studios where many students use the same seat.
Creamik’s choice
After more than 10 years of research and discussion with metal fabricators, at Créamik, we have found the ideal seat.
Here are its characteristics:
1 – Seat with lacquered paint, preventing rust in a humid environment (protection against water and clay).
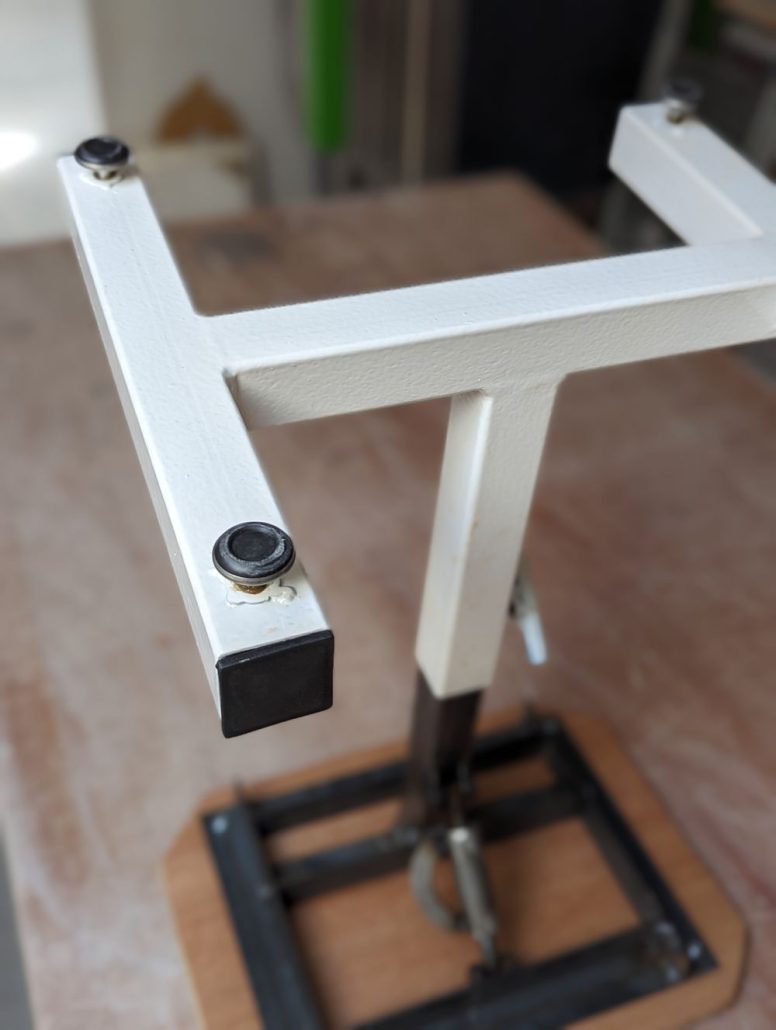
2 – Very stable seat with 4 separately adjustable legs, for studios without perfectly flat floors.
For instance: use a low setting for a side view of your work, and for turning. Use a higher setting for large pieces, allowing the upper body and pelvis to apply pressure on the clay, from above. The seat adjustment mechanism must be secure, with holes in the legs, allowing locking to prevent the seat from suddenly collapsing while you throw!
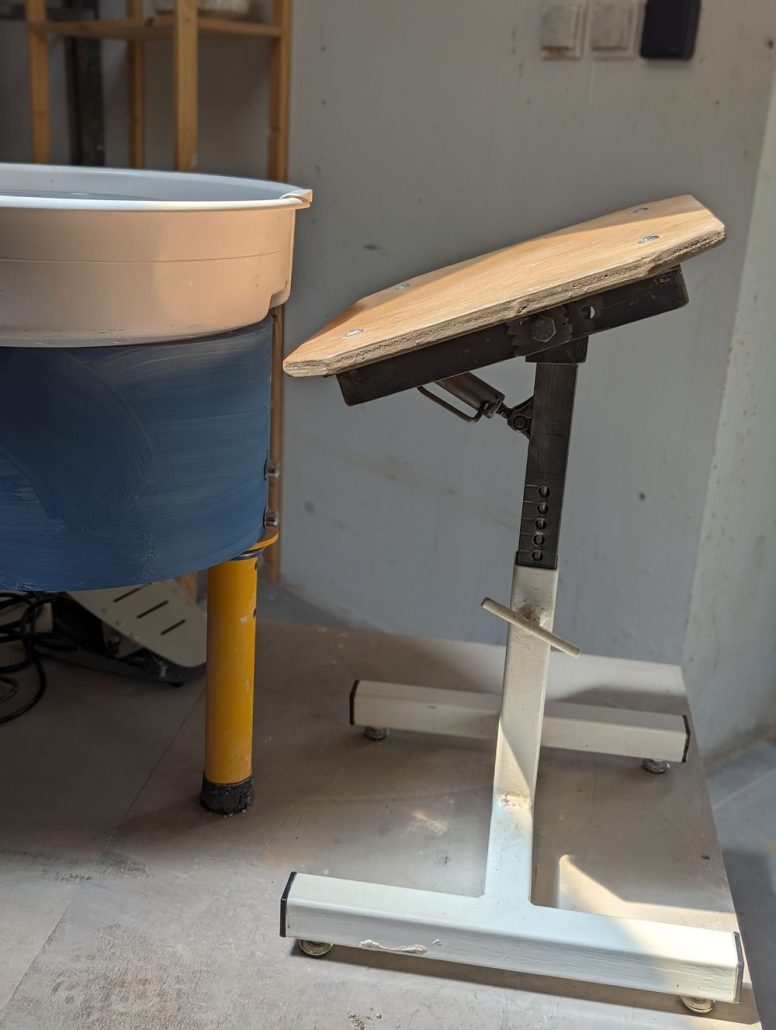
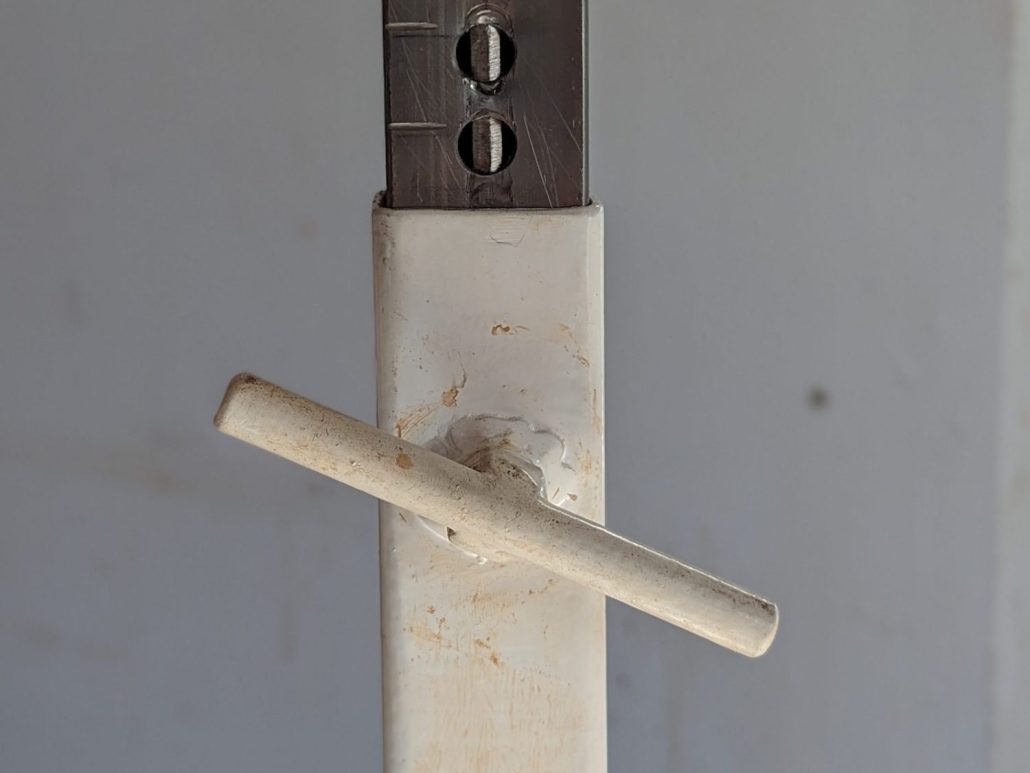
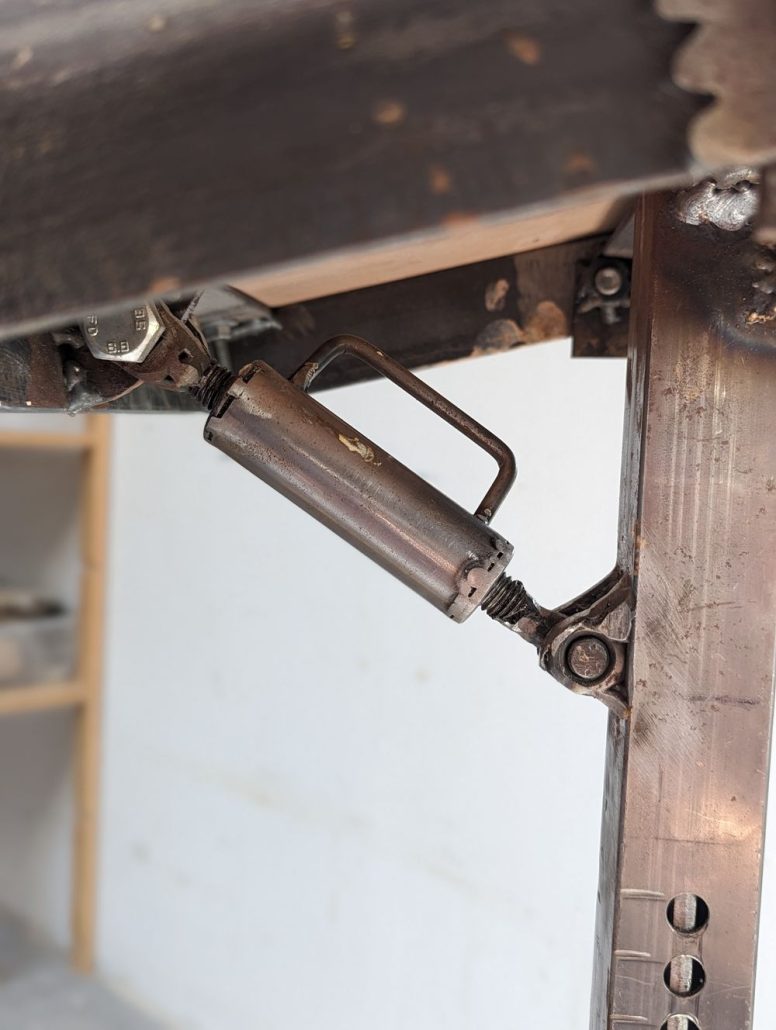
4 – It must be possible to change the angle of the seat: adjustment is easy with a “tube-handle with inverted screw thread”.
Which is to say: an effortless and flexible adjustment, allowing the top of the seat to be tilted. This inclination is essential for back pain management, it allows you to lean forward while keeping your back straight.
5 – The central leg of the seat is not fixed at the centre of the seat but slightly towards the back, preventing any risk of tipping backwards if the potter moves back her or his upper body for a good overview of work in progress.
Conclusion: this seat is made by a craftsman-potter from Brittany, working both in metal and clay. A former student of the Créamik school, he identified the needs of the potter during his training. This seat is the result of successive tests and improvements after several prototypes. It is ideal, both for its range of adjustment possibilities, for the safety of the potter, and for its robustness. For more information, contact the manufacturer directly to get a discounted price: Meriadeg Carré: meria22@hotmail.com
4 – Optimize the workspace
To improve efficiency of your studio, it is essential to optimize your space. By creating specific areas for each step of your production and having functional storage space, you will facilitate your workflow, maintain an orderly studio and keep your tools accessible. For example, the glazing stage should not happen where you throw. Likewise, if you work with stamps and make your own moulds, it is good to have a place in the studio just dedicated to this. On the other hand, if you make plaster moulds on a wheel, you must plan sufficient time to protect and cover the whole studio; under no circumstances should clay and plaster mix together. As for the storage of raw materials, it must be easily accessible and dry.
5 – Organization and planning
In addition to optimizing the workplace, organization and planning play a vital role in the productivity and motivation of the potter. Establish a routine and a schedule for your studio work. Set realistic goals and deadlines for your projects. This will keep you focused and engaged. Try to have an office space dedicated to creativity and planning, where you can easily come to work and think.
6 – Appropriate attire: protect yourself and your home
When you get ready to go to your studio, pay attention to what you wear.
Because we are working clay, and using water and raw glazing materials, we tend to choose sturdy clothes that will, above all, not get damaged. However, our everyday clothing also needs attention. How do you combine normal, everyday clothing with a messy job? One can now find work overalls which come in attractive colours. You can wear them on top of your normal clothing. They have two zippers, they are quick and easy to take off, you can switch from the studio to your house without transporting dust into your living space. If you must change every time you go into the house, sooner or later you will end up sitting on the sofa in work clothes full of dirt, without even realizing it. However, it’s unlikely your family will not notice!
Choose overalls large enough to move comfortably in, but also large enough to allow several layers in winter. I recommend getting one for each day, to avoid starting the day with yesterday’s outfit full of clay. When the overalls have dried, shake them off to protect your washing machine before washing. Washing machines are made to withstand some soil and clay, but are much less resistant to plaster.
If you adopt good habits with clay, you will naturally do it when you work with plaster too. Plaster will clog pipes and damage your washing machine. Ditto for shoes, they will carry a lot of dust back to your home. It is best to have shoes without laces or even clogs that can be taken off and put on quickly; remember to choose washable ones. One detail that is also important: if your overalls are attractive, and you appear in photos and videos, it will be more engaging to your audience.
7 – Dust management
As mentioned in the previous paragraph, dust from dry clay is a crucial element to manage in your studio. Clay dust is a health hazard because it contains silica, a substance whose tiny particles can damage the lungs and cause silicosis. It is therefore essential to put in place health and safety measures to preserve a safe environment and avoid inhaling these particles.
Be sure to clean surfaces regularly, using a damp cloth (dry wiping only stirs dust into the air) and an industrial vacuum suitable for dust. You can opt for a vacuum cleaner with a HEPA (High Efficiency Particulate Air) filter specially designed to capture fine particles, including those from clay. Wear a mask while cleaning, when handling powders and when preparing glazes. Remember to ventilate your studio regularly.
For those who wear glasses: the glasses protect your eyes, but they quickly get dusty. It’s good to keep a pair of glasses in the studio, and you must remember to run your glasses under water before wiping them, otherwise they will be scratched immediately. Contact lenses are not recommended otherwise wear safety glasses as soon as you are in the workshop.
It is preferable to have a laundry area in the house; it is convenient to be able to wash your work clothes in a laundry room before going into your living space. Here again, dust in the family living space is eliminated. To find out more about how to protect yourself from dust, see our article on safety rules in the workshop.
8 – Healthy hands and skin
The health of hands and skin is of paramount importance in the practice of pottery because our hands are our principal work tools.
Clay, water, cold, glaze, raw materials . . . all of these can damage the skin, especially when it becomes dry and small wounds form. Cuts with tools are to be handled with care. Wounds must be treated quickly in an appropriate manner to avoid infection; a sore around the nails can lead to whitlow. It is necessary to wash your hands well after work, with a mild soap, and moisturize the skin with a cream applied generously.
When using irritating products, it may be advisable to use disposable gloves. Take care of your hands, protect your wrists and finger joints. A finger stuck in a door, a finger sprained playing basketball, and you will be unable to work for days . . .
9 – The general atmosphere
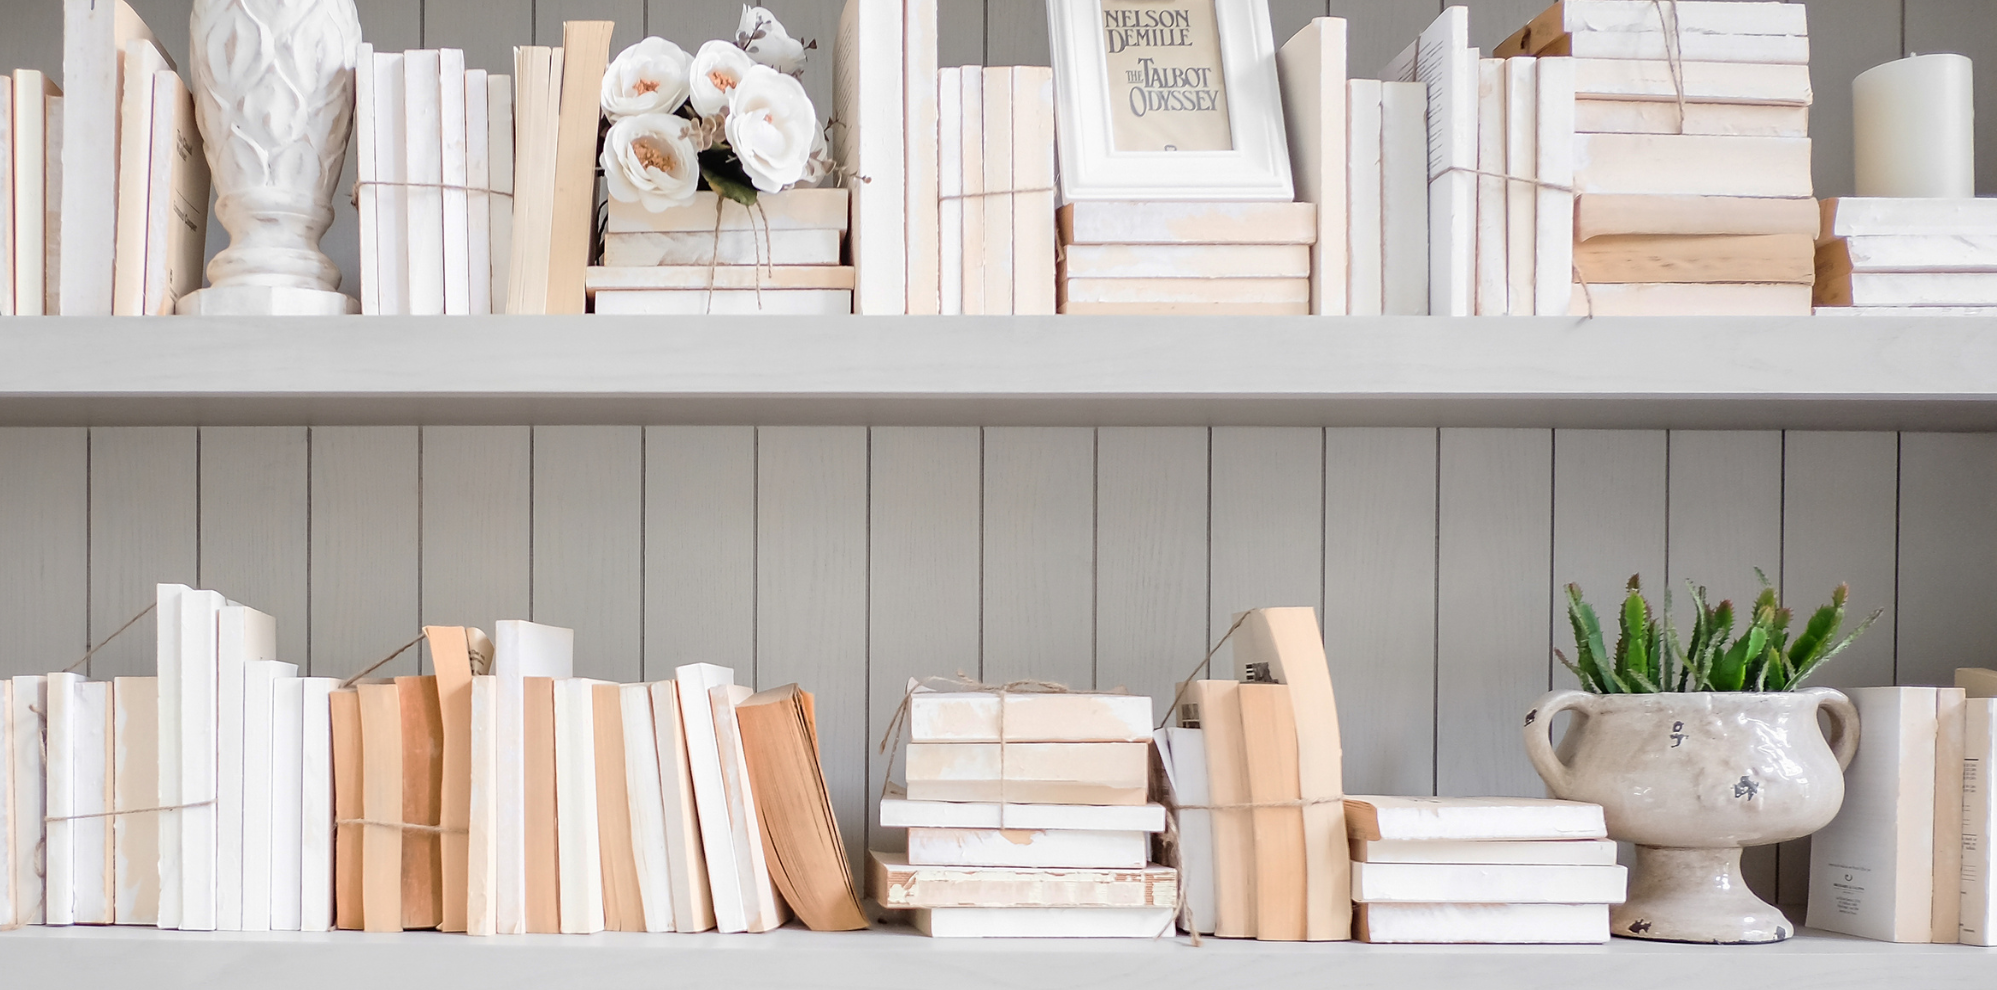
Maintaining a clean and tidy space is fundamental for your own concentration, but it is not enough. You also must keep your studio warm. You may have started pottery in a somewhat spartan place like a garage. You will need to think about how to keep it warm in winter. To create a stimulating and creative environment, think of bringing a beautiful plant into your work environment. Play your favourite music, but also place inspiring artwork on the wall. You can listen to the radio and discover interesting shows or subscribe to podcasts. These shows may even help you to maintain a regular work schedule. On days when you are less motivated or maybe just tired, you can look for tips and tricks from other potters; thanks to the internet full of exciting videos, it’s easy to get help from a range of artists. Taking time to watch some of them can be inspirational.
To give you new ideas, you can also turn to books, especially if they contain beautiful illustrations. And finally, subscribe to a professional magazine. In the digital age, it is a pleasure to receive magazines in your mailbox, to keep them at home and to dive back into them regularly. We all have favourite issues that we read again and again with the same pleasure. Some studios have enough space for a relaxation area. Teatime can become a well-deserved habitual break, with children, friends, fellow potters, using a teapot and cups made by you, the potter. All these elements will personalize your workshop, make you feel at home and make you want to spend time there.
In short, the pottery studio is much more than just a workplace. Every potter can create an environment that not only promotes a passion for pottery, but ensures health and well-being. The studio becomes a real extension of the home where it is good to live, create and dream.
")
Resource centre
animated by Matthieu Liévois,
potter-ceramist for over 40 years and founder of the Creamik School
Find all the courses
Keywords
Don’t miss any more news from the Créamik school!
Follow us on the networks
You can also discover…
Less math, better research: Generative Artificial Intelligence in the Ceramic Industry

Garance Lanfray, journey through Southeast Asia

From beginner to professional : choosing the right ceramic courses

Matthieu Liévois, The search for crystals
Can ceramics be fired in a microwave?

Discovering the Art of Japanese Ceramic Masters
Instructions for making your own sieve