
Creating unique ceramics with Matthieu Liévois’ overlay glazing techniques
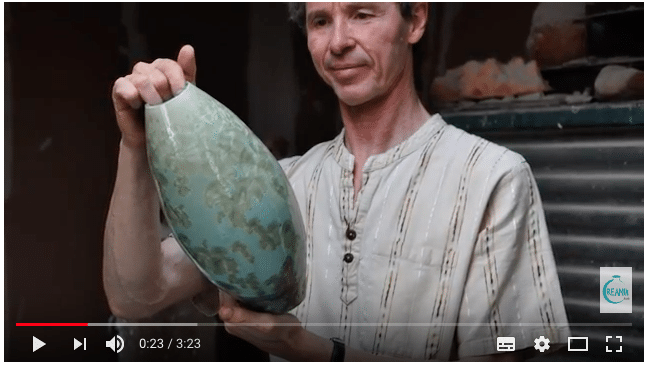
You know Matthieu Liévois as a professional potter and teacher, but did you know that he is also a specialist in the creation of glazes? He has worked for over 40 years to perfect his techniques, testing and researching to find unique colours and textures.
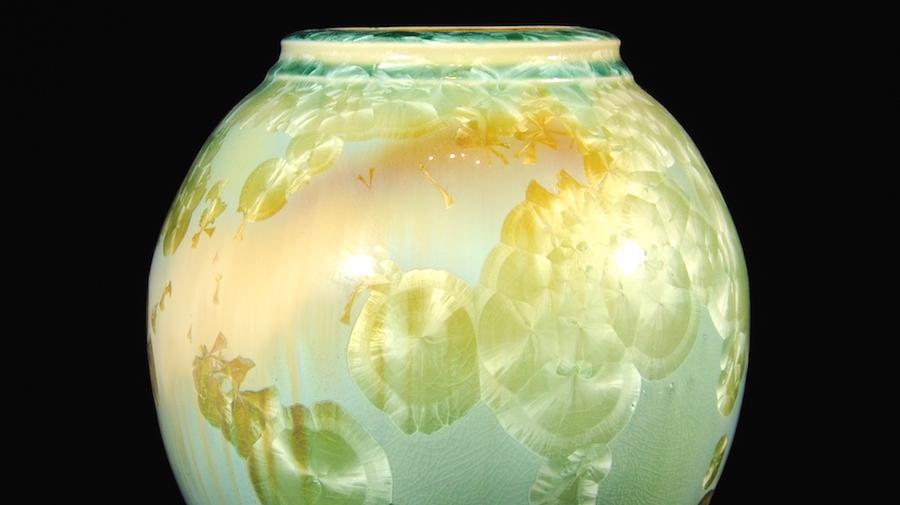
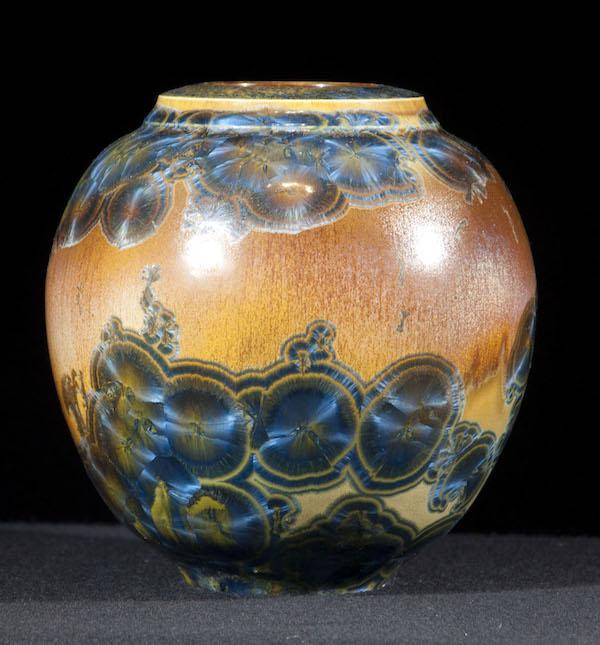
He is best known for his mastery of crystallization, a natural phenomenon identical to that of snowflakes, but in the case of glazes, this occurs at high temperatures (around 1280°C, or 2336°F). It is a technique that requires the use of special glaze recipes and a rigorous firing method. In particular, it is necessary to make soaks (or heat plateaus) when lowering the temperature (the kiln is kept at a specific temperature for a certain period of time, which allows the crystals to form).
But Matthieu’s real expertise lies in the layering of glazes.
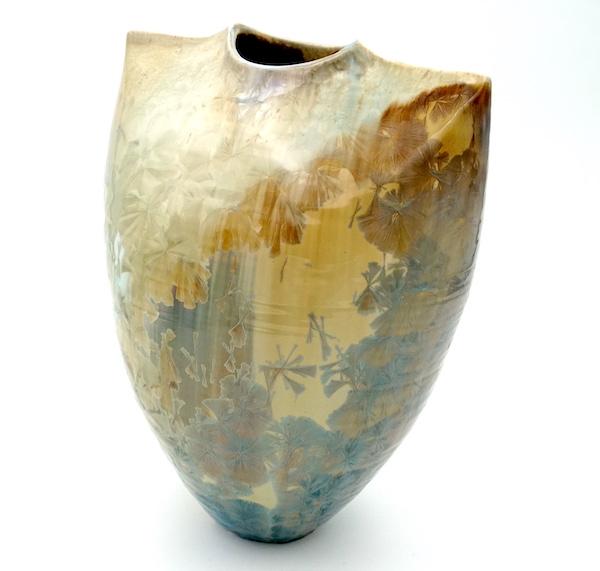
- He uses a relatively classic technique which consists of layering standard glazes. However, his speciality is that he manages to layer up to 7 of them on the same ceramic!

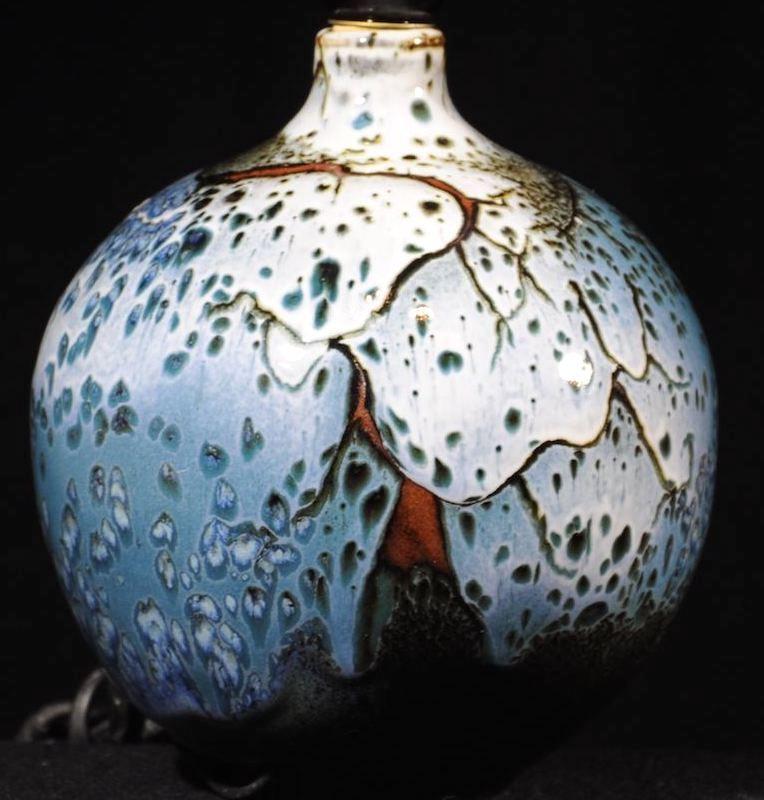
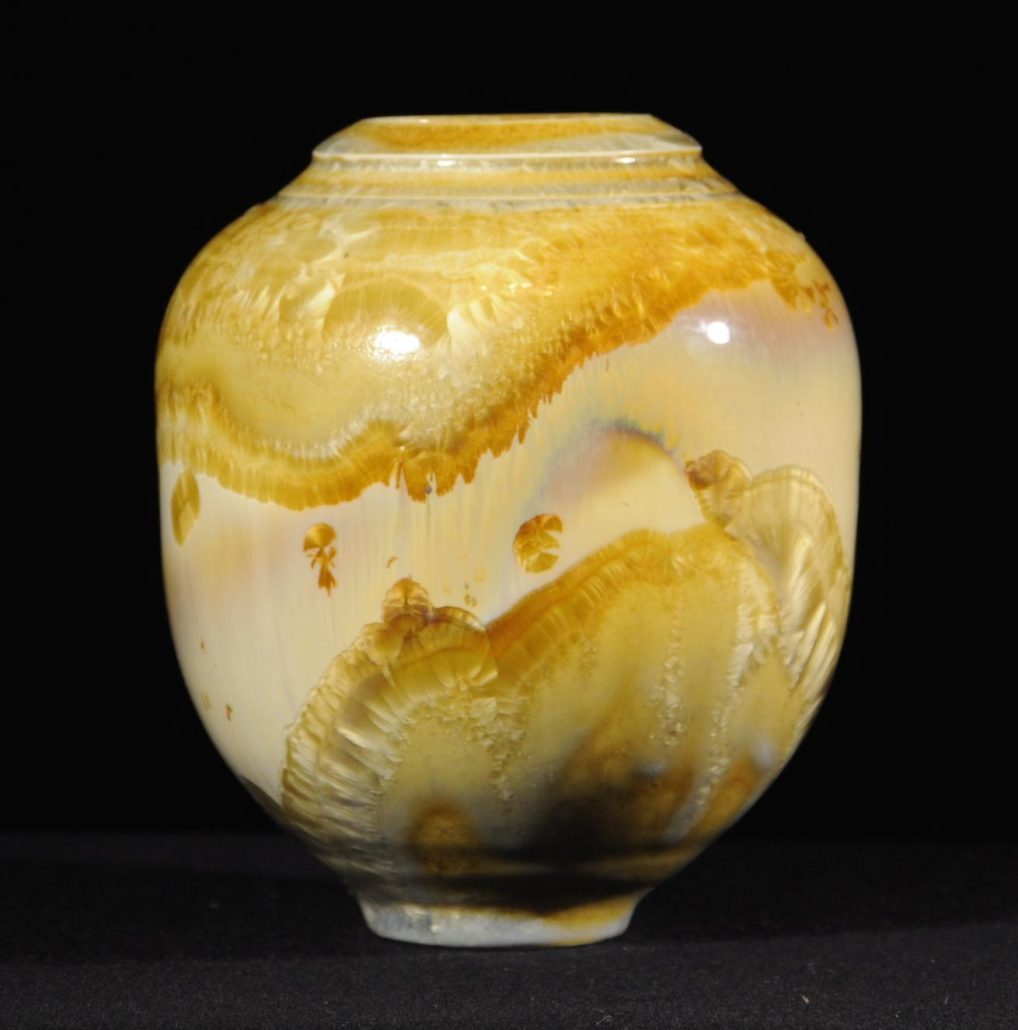
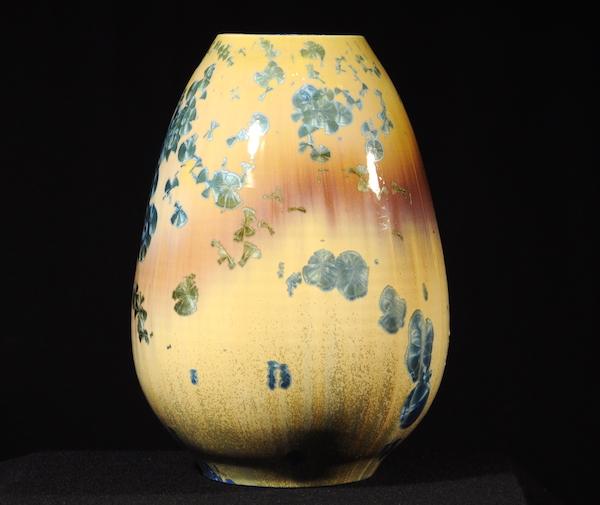
- Additionally, a much rarer technique he uses consists of layering three glazes, one of which is a crystallization glaze. This allows him to create landscape effects for ceramics with subtle, unexpected and unique designs.
Want to know more about these advanced overlay glazing techniques? This article tells you all about it.
Glazing by superimposing 7 classic glazes to create new movement effects
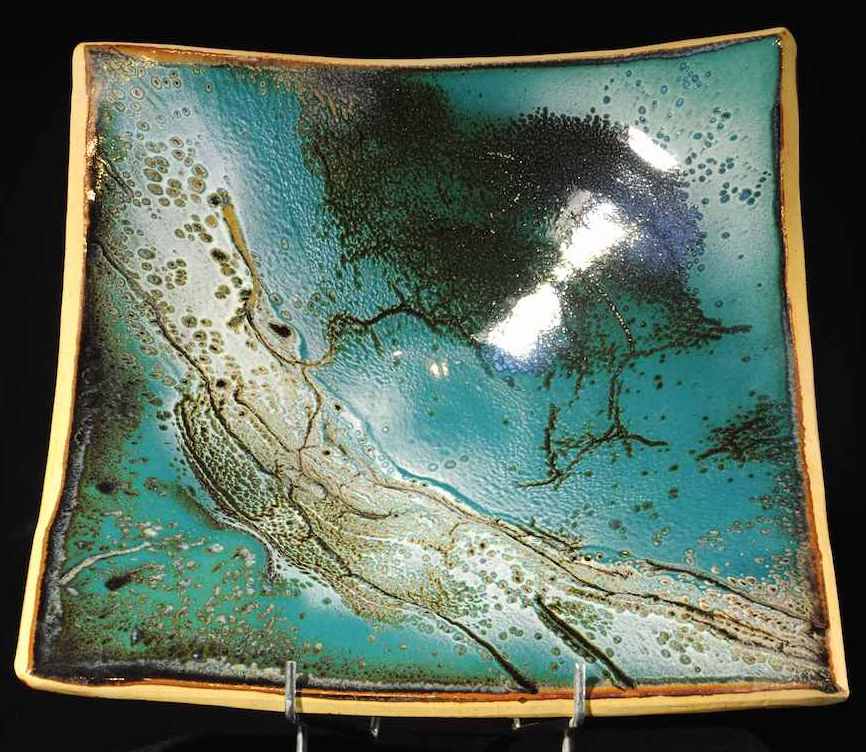
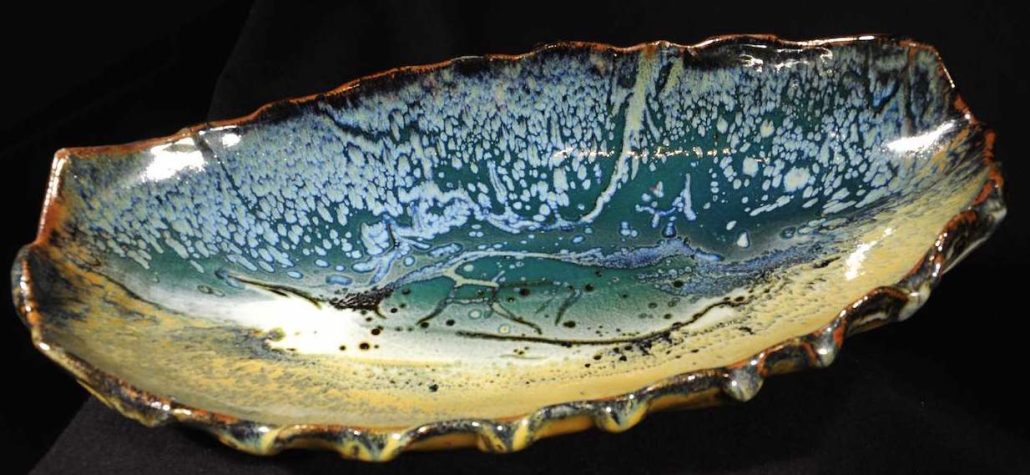
The superimposition of glazes allows one to go further than the simple colouring of a ceramic, it allows one to create real paintings, landscapes or patterns.
The magic of glazing is that you have only partial control over the result, as the reaction of the glazes to firing, while it can be influenced, cannot be totally controlled. Thus the creation by layering ceramic glazes will be a clever mix of skill and mystery, but above all, it will be an absolutely unique piece. Indeed, it is impossible to create two identical pieces.
Each time Matthieu opens the kiln at the end of a glaze firing, it is always a magical moment, where impatience is mixed with apprehension, because you never know what patterns will be revealed and what landscape will appear.
Layering glazes to play with colours
To create a painting with ceramic glaze, you have to unlearn what you know about colour! You have to go against your intuition because layering a yellow glaze with a blue glaze will not give you a green ceramic. The rules for mixing colours that are used for painting do not apply here. It is the fusion of oxide and rock powders that gives the glaze its colour.
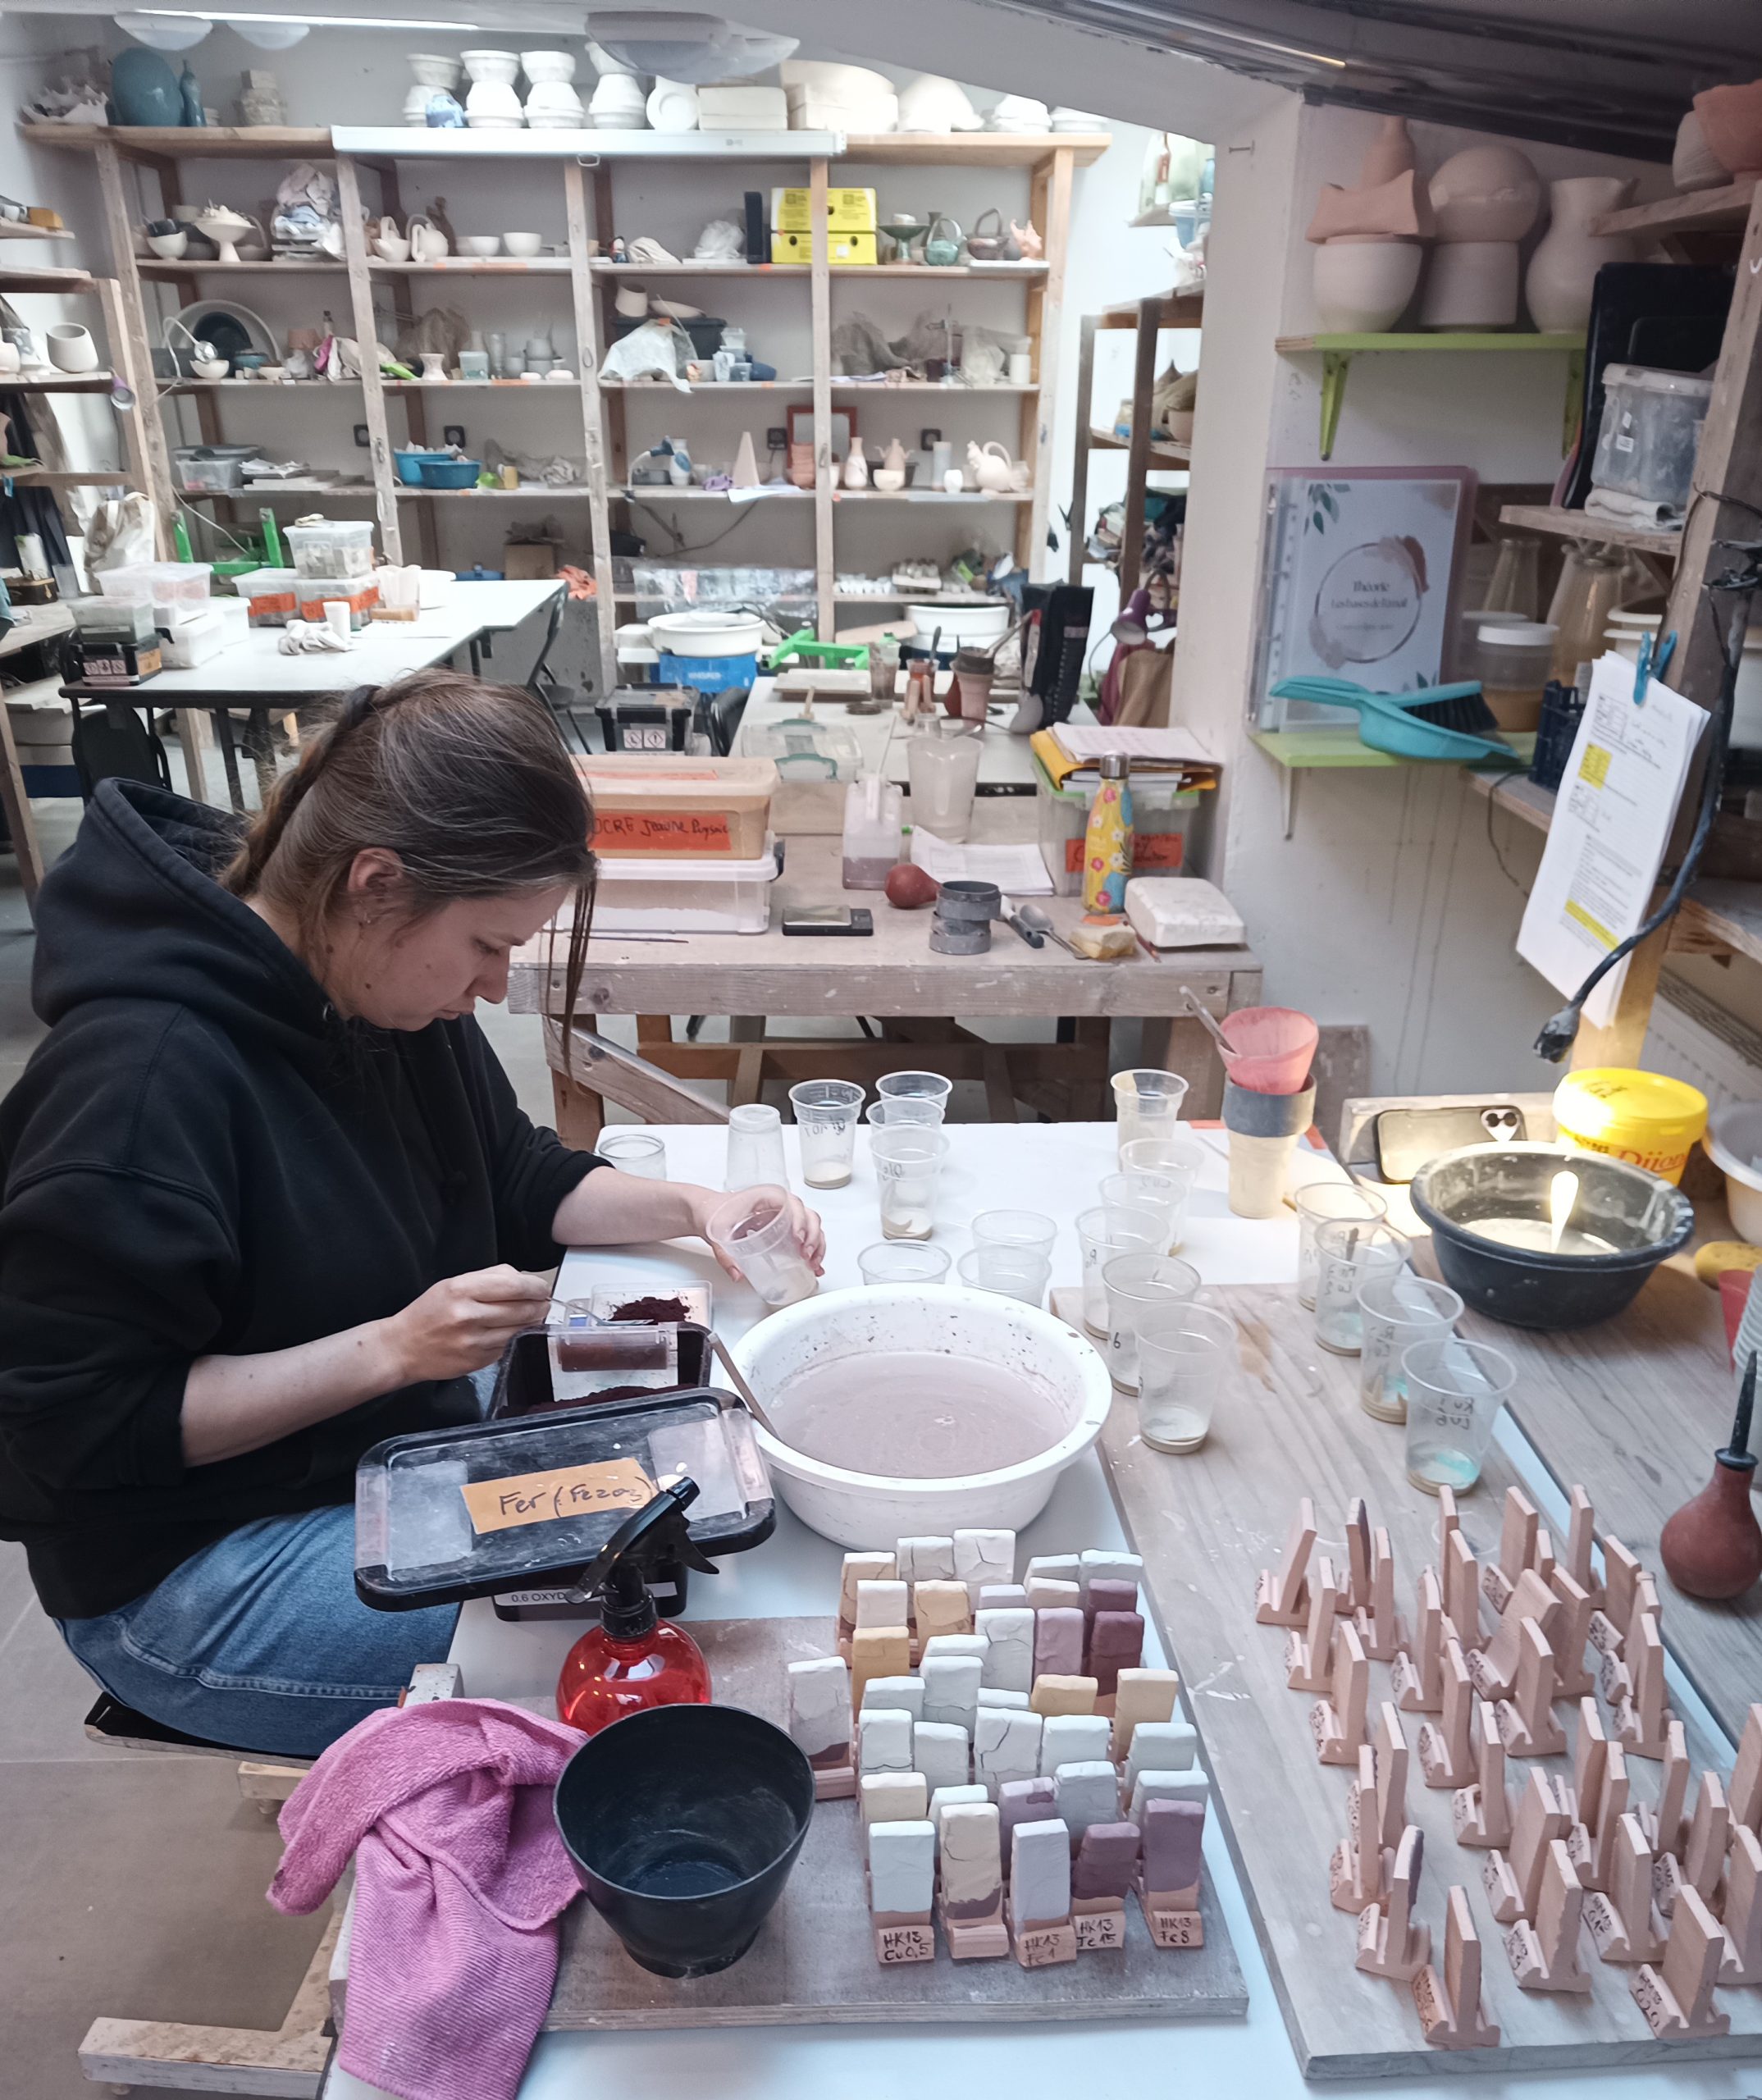
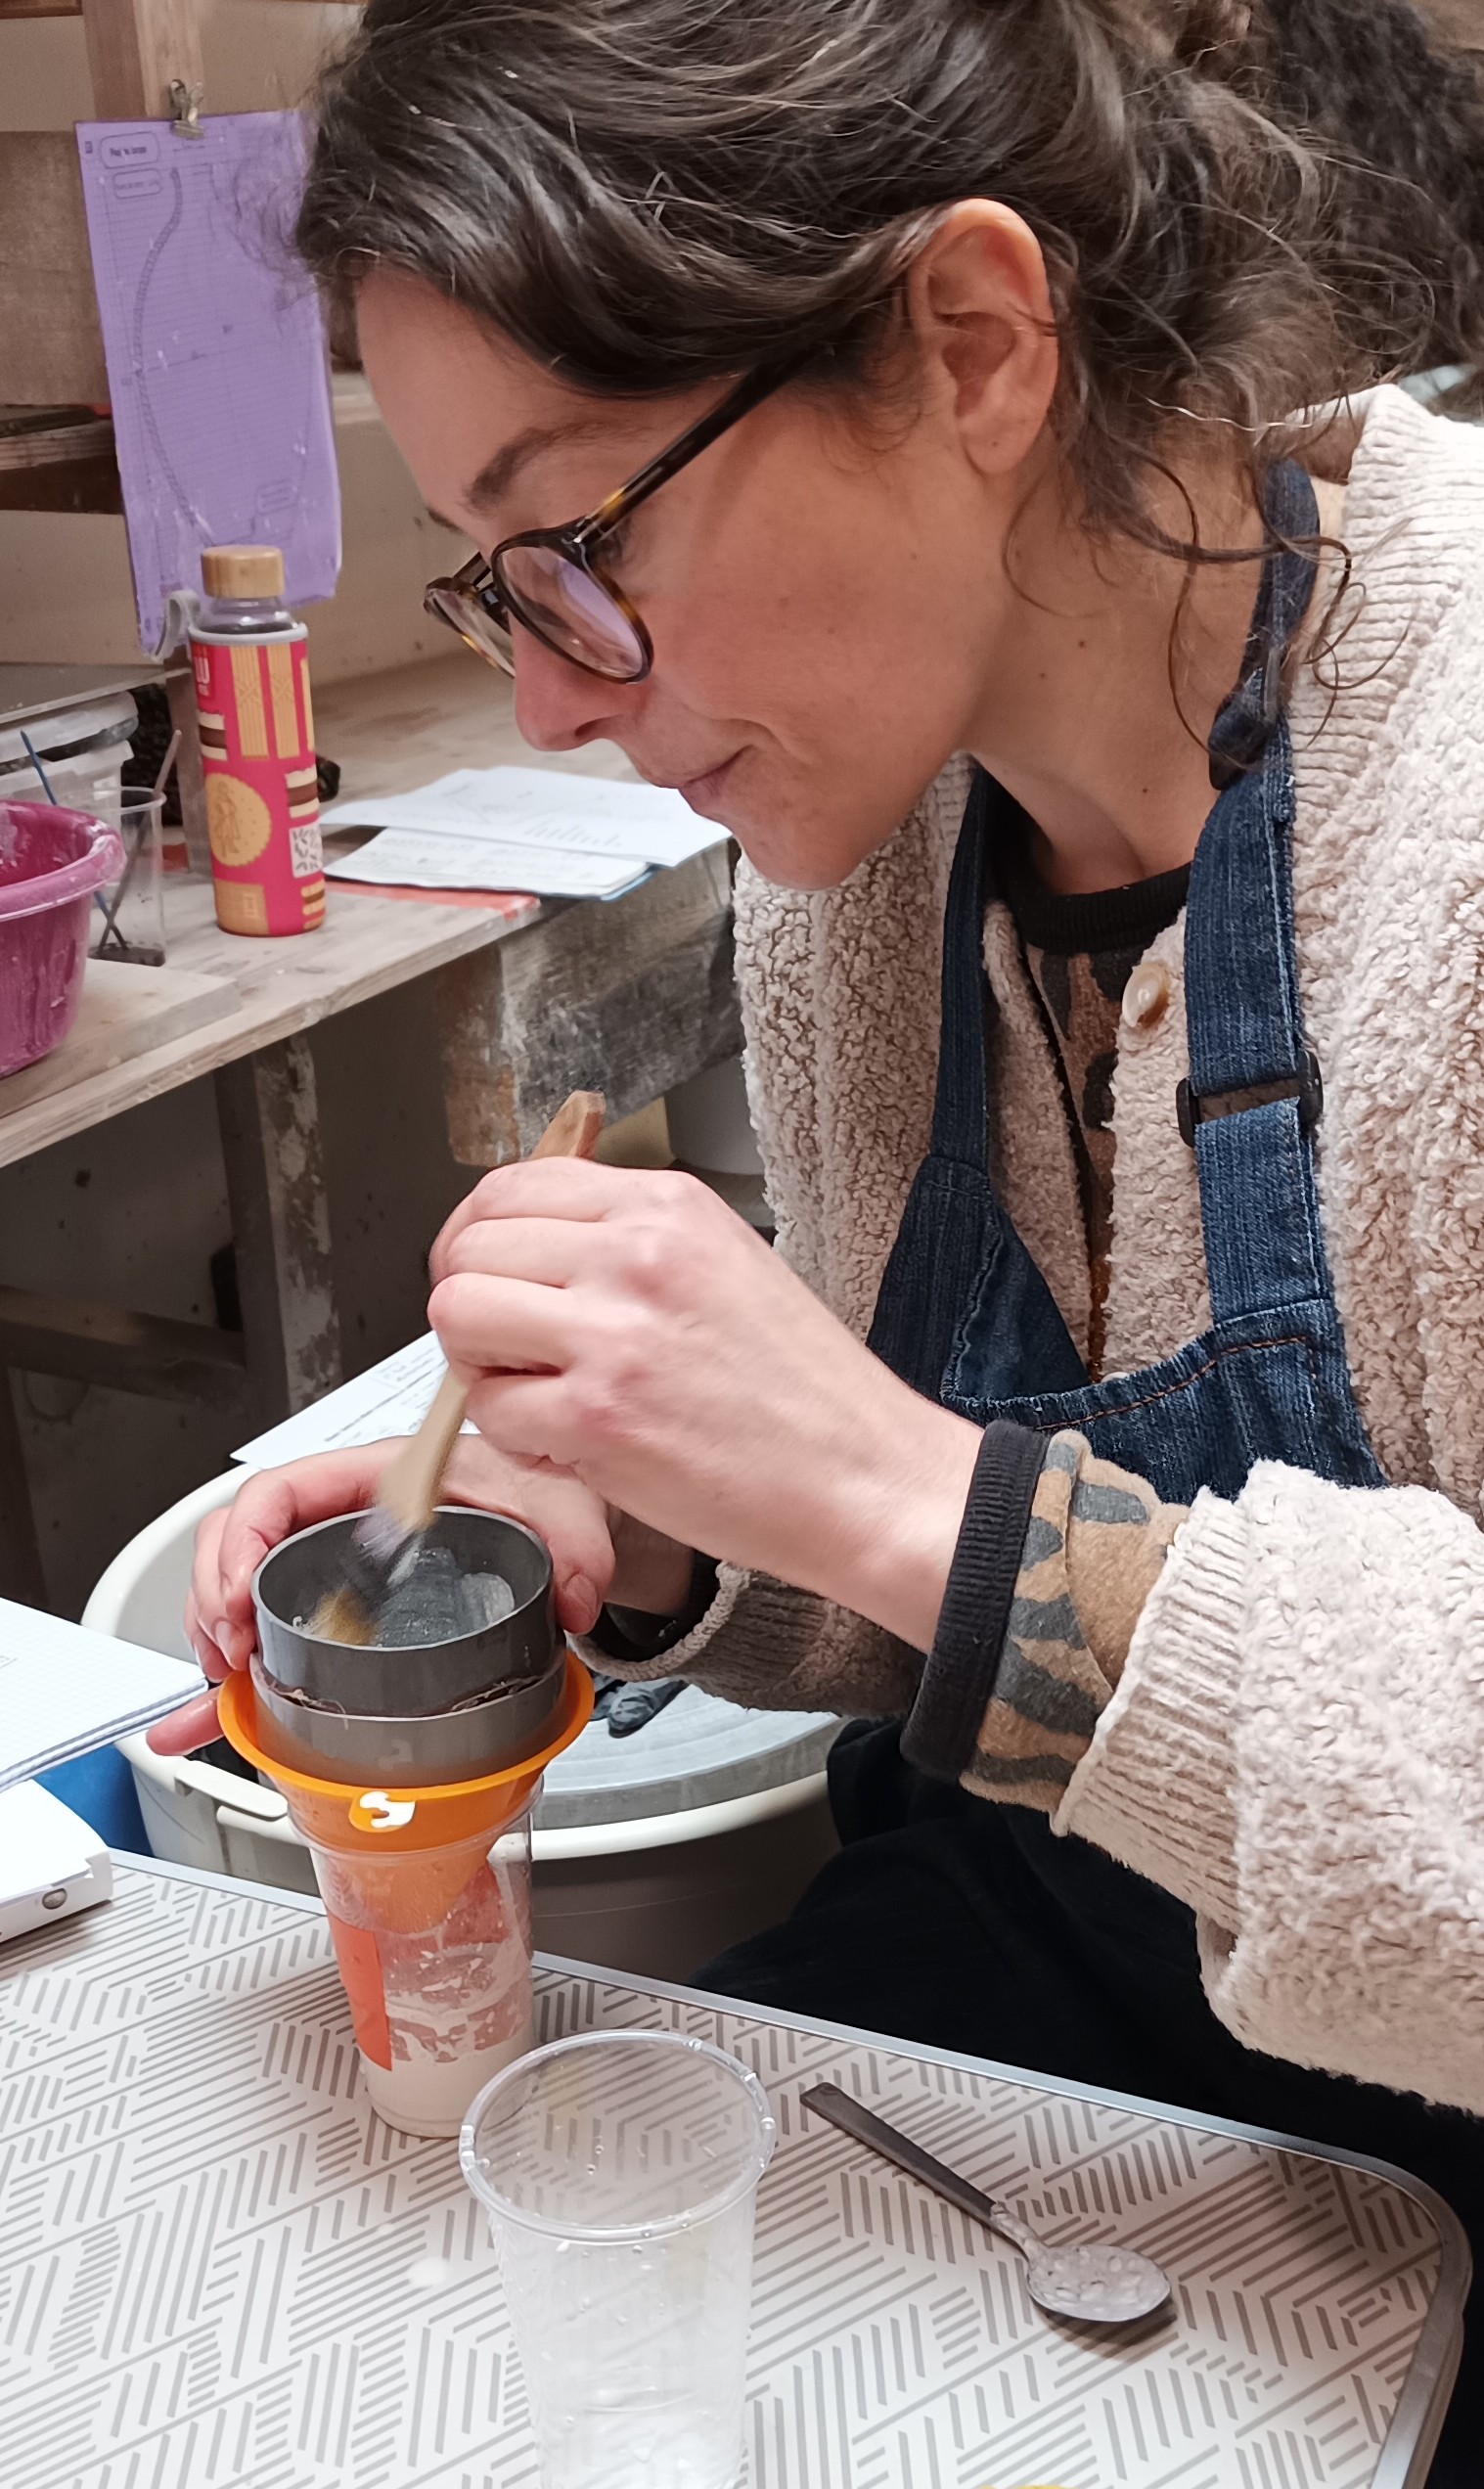
Since the glaze powders are mainly white and the colours are only revealed after firing, it is impossible to change the look by gradually adding touches of colour. For this reason, Matthieu always begins his creations with a visualisation exercise. He draws a diagram of his piece taking into account the different properties of his glazes:
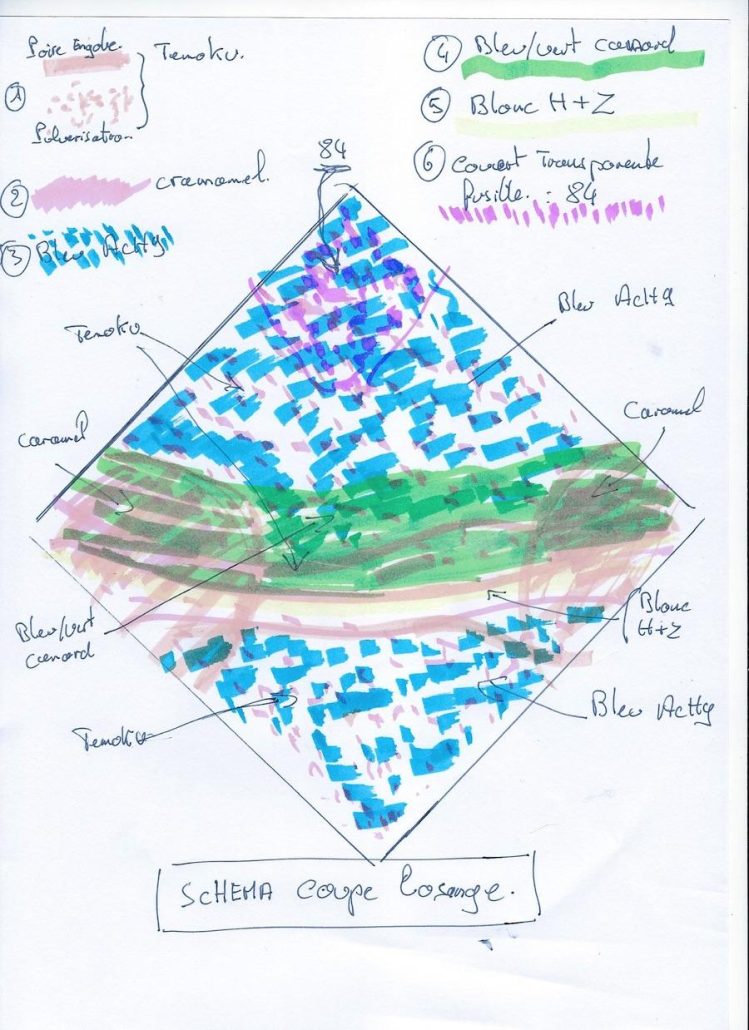
He then proceeds to choose the colours to be used on the basis of a global vision of the ceramic piece. If he is looking for a rather light final result, he will first apply dark glazes and then progressively lighter glazes. If he is looking for a darker look, he will do the opposite.
Using layering techniques to create decorative effects
Of the seven different glazes used by Matthieu, only two or three will provide different colours. The others will be used to create texture, movement effects, and colour gradients. Once again, the effects obtained are not due to the mixing of different colours, but due to the layering of glazes with different fusibilities.
For example, the technique for obtaining a green gradient is not to use three different greens, but rather to apply a dark, almost black glaze as an undercoat and then apply the green colouring glaze on top. Then, in some places, a transparent glaze is applied, whose high fusibility will increase the fusibility of all lower layers. At this point, the black glaze applied as a first layer will pass more easily through the green glaze, and darken its colour.
The result can also be influenced by applying several layers of the same glaze to play with its thickness or by using different application techniques: ladling, dipping or spraying. As you can see, the possible combinations for the application of 7 successive layers of glaze are infinite!
However, practice has allowed Matthieu to find some trends, which guide his choices. Here are some of them.
To discover other techniques, sign up for the online glazing course.
Firing characteristics to create specific decorative effects on ceramics
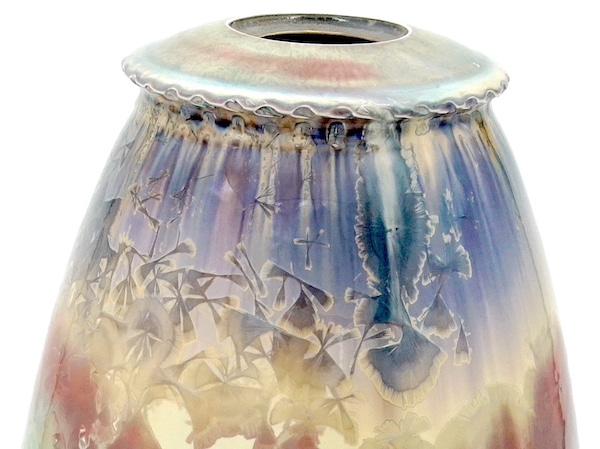
The bubbling effect: when the glaze applied first is more fusible than the one above it, it will pass through creating spots similar to the bubbles in boiling water. This effect is also known as a fur or partridge feather phenomenon.
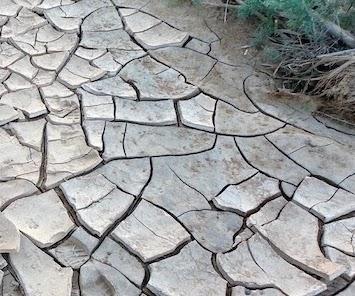
The withdrawal effect: when the top layer is a plastic glaze – i.e. it swells like a sponge when soaked in water, and shrinks like mud in a dry pond when the water is absorbed by the ceramic – when drying, the shrinkage will create crazes on the surface of the glaze :

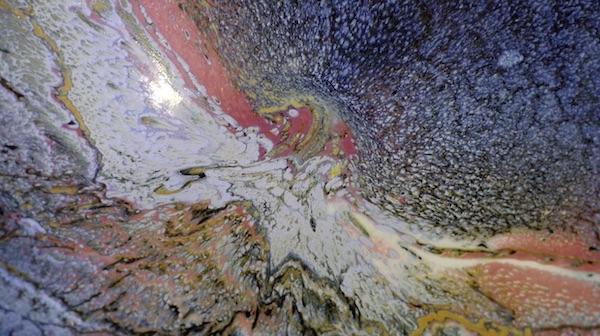
Combining layering with crystallization to create unique ceramics
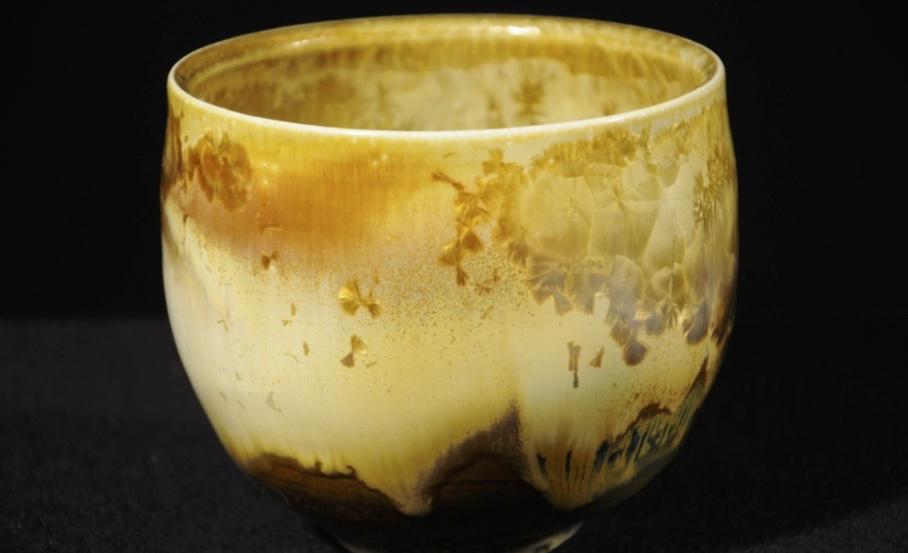
The most classical layering when practising crystallisation consists of applying a coloured slip (which brings colour without the risk of dripping, as it is more stable), then a transparent crystallisation glaze. The crystals will reveal the colour of the slip underneath, giving very beautiful effects.
But Matthieu wanted to create more complex and subtle landscape effects, so he chose to work only with layering glazes (without slips). This is much riskier, since the accumulation of glazes, all of which are likely to run and influence each other, multiplies the risk of getting flaws. Thus, as we have seen, the result is random, but when the magic happens, totally unique pieces emerge from the kiln, impossible to replicate and whose beauty never ceases to amaze him.
Layering and crystallisation, a subtle glazing technique
Because crystallization recipes require a very subtle balance for the crystals to form, Matthieu limits himself to 3 different glazes.
It is not possible to predict in advance where the crystals in a ceramic will develop. However, we can decide where they will not be able to develop, thanks to the application of an underlayer that prevents crystallisation.
Always be careful to anticipate the likely reaction of the glazes. Indeed, if we can prevent the development of crystals locally, we cannot prevent those that have developed elsewhere on the ceramic from sliding onto the molten glaze, and on cooling, fixing themselves where they were not expected.
The art of the experienced ceramist is to predict in advance how the different layers of glaze will behave. Many tests and observations were necessary for Matthieu to find the right dosage of glaze powders, the right choices of layering, the right application gestures, allowing the spectacular rendering of his ceramics.
Using the layering technique to correct a defect on a ceramic
Layering is useful for aesthetic purposes, but it is also useful for correcting a fired ceramic with a defect. All that’s needed is a new layer of glaze.
But, you may say, glazing is a technique that consists of making the glaze stick to the ceramic by making sure that the water it contains is absorbed by the still porous clay. Yet, an already glazed and fired ceramic is no longer porous, so a little trick is needed to make the glaze stick:
The glazed ceramic must be heated to 150°C (302°F), then re-glazed while still hot (wearing gloves to protect yourself from the heat of course), so that the water in the glaze evaporates on contact with the already-glazed surface. The piece is then placed back in the kiln for a second full firing cycle.
However, you must bear in mind that the entire glaze will melt again. So it is not only where you have corrected the defect that the ceramic will change. The ceramic may not look at all like it did when you first took it out of the kiln!
This is especially true for crystallization glazes: the crystals that appeared during the first firing will melt & disappear, and other crystals will appear, perhaps flowing to other places.
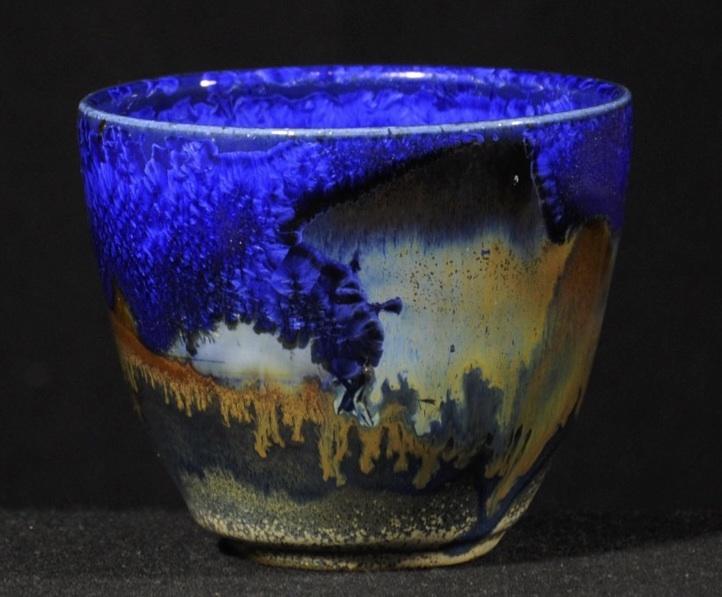
This sometimes gives magnificent results, as the ceramic below, but they are even more difficult to replicate because the number of variables has been multiplied.
Want to know more about layering and crystallization techniques?
Matthieu Liévois shares his craft secrets with you in his online ceramics courses, sign up now!
")
Resource centre
animated by Matthieu Liévois,
potter-ceramist for over 40 years and founder of the Creamik School
Find all the courses
Keywords
Don’t miss any more news from the Créamik school!
Follow us on the networks
You can also discover…
Less math, better research: Generative Artificial Intelligence in the Ceramic Industry

Garance Lanfray, journey through Southeast Asia
From beginner to professional : choosing the right ceramic courses

Matthieu Liévois, The search for crystals
Can ceramics be fired in a microwave?
Discovering the Art of Japanese Ceramic Masters
Instructions for making your own sieve