
How to handle plaster waste when you make your own slip-casting molds?
In a ceramics school like ours, there are all kinds of waste materials, such as clay, of course, but also glaze and plaster. While most people think pottery is all about throwing, at Creamik, our students also learn slip casting and the art of making their own molds, for which they use plaster. Because plaster residue is a particular type of waste, we also teach them how to manage it responsibly. Here’s how we do it.
See also our articles on clay and glaze waste management.
Plaster powder: your pottery studio drains’ worst enemy
As with glaze, it is most important never to wash hands and tools used to handle plaster in a sink, even if it is connected to a sedimentation tank. Plaster deposits would clog the pipes in no time!
Clogging is the problem with plaster. Even though unlike glaze, plaster is not toxic and does not pollute, washing plaster-covered potter’s tools or even your hands in a sink is a sure way to clog it… And of course, it’s not very good for sewage treatment plants either.
At Creamik, we have found an innovative solution
At the Creamik ceramics school, we use nearly a ton of plaster in 15 days during our mold creation course. For this reason, we had to come up with a solution to avoid finding some of this plaster in our drains.
Here’s the best solution we found: we use cattle troughs as settling tanks. Why? Because they have the advantage of being very large: 1 m in diameter and 80 cm deep. We add water so they’re about one-third full and wash all our tools in them.
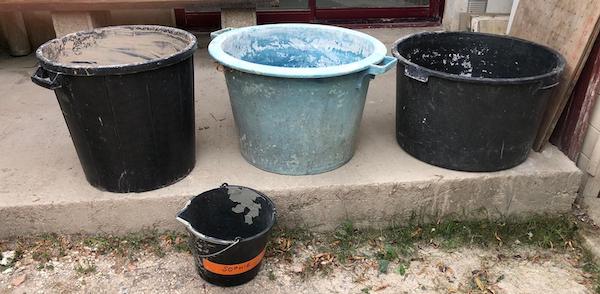
The two tanks on the right in the picture are cattle troughs. They were bought from a farm cooperative, the only kind of place where you can find such large tanks. Look at the garbage can on the left: it’s a little narrow for washing tools!
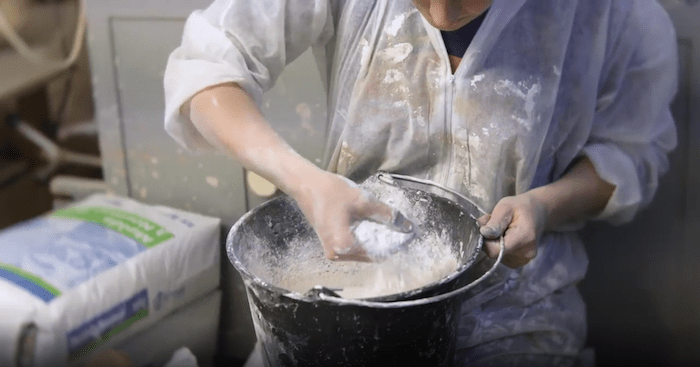
Recovering plaster powder from water
Plaster that settles in water cannot harden; instead, it forms a kind of white slurry at the bottom of the basin. As the student potters work on their slip casting molds, they wash their tools, and the plaster accumulates.
The water sitting on top will gradually evaporate. When there is no more room to wash the tools, students simply siphon off the remaining water and then pour the white mud into rubble bags, which are hung up to allow the remaining water to drain.
How to dispose of plaster waste
With the quantities produced by the pottery school, it is unfortunately impossible to recycle these residues: it would take too much time and effort. The only thing left to do is to take the bags of drained mud to the waste disposal center. Some centers have a special skip or dumpster for plaster, but if not, the bags can be thrown in the general waste, as it is not an environmentally hazardous product, unlike glaze powder.
Using plaster residue to improve a vegetable garden’s yield
Since plaster is not harmful, it can be reincorporated as a slurry into your garden soil. If your ceramics studio is near the ocean, the soil in your garden may contain a lot of silica (sand). It therefore certainly lacks some calcium: plaster of Paris, which is made from gypsum, can provide it. This is a practical tip to improve the yield of a vegetable garden!
Recycle plaster waste in glaze preparation
You can also recycle plaster by incorporating it into your glaze recipes. Plaster of Paris is made from gypsum, a natural rock that is ground very fine. It is a calcium sulfate: in other words, it is calcium, CaO, with sulfuric acid salt. But don’t panic, it is only a salt and not pure sulfuric acid. Its chemical formula is CaCO4 + 2H2O. It is therefore an important calcium contribution for your glazes.
Before incorporating the plaster, you need to let the slurry dry, then fire it in the oven at 300°C to break up the small grains that have become hard. Because the slurry is never uniform, there are always small particles of plaster that harden. After firing, you will have to wait 2 to 3 weeks for the powder to reform. The process occurs by itself – there’s no need to grind: the plaster reabsorbs the ambient humidity, swells, breaks and disintegrates all the particles that are still hard. Thus, you get a calcium powder, similar to the calcium oxide that is usually incorporated into glazes. This is a good solution for glazes that are very rich in calcium, such as the number 1 recipe on Daniel de Montmollin’s diagram.
This technique is only useful if you make your own glazes, so why not get started?
")
Resource centre
animated by Matthieu Liévois,
potter-ceramist for over 40 years and founder of the Creamik School
Find all the courses
Keywords
Don’t miss any more news from the Créamik school!
Follow us on the networks
You can also discover…
Less math, better research: Generative Artificial Intelligence in the Ceramic Industry

Garance Lanfray, journey through Southeast Asia

From beginner to professional : choosing the right ceramic courses

Matthieu Liévois, The search for crystals
Can ceramics be fired in a microwave?

Discovering the Art of Japanese Ceramic Masters
Instructions for making your own sieve